How to Install Oracle VM VirtualBox 6.1 on Windows 10 Step by Step with Screenshots
In this blog post we will have a look at How to Install Oracle VM VirtualBox 6.1 on Windows 10 Step by Step with Screenshots. However we will also learn how to install Oracle VirtualBox Extension Pack after the installation of Oracle VirtualBox 6.1. It is a virtualization application which allows to run different operating systems on the host machine. However, VirtualBox supports both 32 bit and 64 bit version of almost all the major operating systems.
Furthermore, VirtualBox was first released by Innotek GmbH, Germany, under the proprietary software license. In 2007 Innotek released VirtualBox open source edition under the GNU General Public License. Innotek GmbH was acquired by Sun Microsystems in 2007. However, Oracle Corporation acquired Sun Microsystems in 2010. Since then Oracle Corporation renamed VirtualBox as Oracle VM VirtualBox. Currently Oracle VM VirtualBox is freely available from the Oracle Corporations Official Website.
Virtualization Technology
However, the OS that is installed in the VirtualBox is known as guest OS. The OS on which VirtualBox itself is installed is known as host OS. We can install multiple operating systems in VirtualBox. We can configure, start, pause and stop each operating system installed in the VirtualBox independently.
There are two types of virtualization technology. One is software based and the other is hardware based. VirtualBox 6.0 and prior versions had software as well as hardware based virtualization. We had the choice of selecting the type of the virtualization if the hardware has the support. The software based virtualization is dropped from the latest version 6.1 of the VirtualBox.
To enable the hardware based virtualization, we have to go to the BIOS menu of our Laptop or Desktop computer. Then from the BIOS menu enable the virtualization option. Hardware based virtualization improves the overall performance of the system, especially the graphics. If you are on a windows System and you want to know whether your system supports virtualization or not. Then it is very easy to figure out. Open the task manger in the Windows. Navigate to the performance tab. If your system supports virtualization then at the bottom right it will show the status of virtualization as enabled or disabled. If your system does not support virtualization then the above information will missing from the screen. The task manager screen is shown below for your reference.

In VirtualBox Host OS and Guest OS can communicate with each other by shared clipboard, shared folders or virtual network. Additionally, if more than one guest OS are installed in VirtualBox then the Guest OS can also communicate between each other.
Installer Download Location
Below given is the download link of the official website of VirtualBox installer application.
| Link to the Oracle VM VirtualBox 6.1 Installer Application |
Prerequisites for Installation of VirtualBox on Windows 10 Computer
- First we will require a system with supported operating system installed on it for the installation of VirtualBox 6.1.
- VirtualBox 6.1 supports Windows, MacOS and most of the major Linux based operating systems.
- VirtualBox also supports 32 bit and 64 bit operating systems.
- A detailed list of supported operating systems is available on the official website of Oracle VM VirtualBox.
- A stable and fast internet connection will be required for downloading the VirtualBox application installer and the extension pack.
Here, we will be installing the Oracle VM VirtualBox version 6.1 on a Windows 10 computer. Now we have fulfilled the all the requirements for the installation of the VirtualBox.
Installation of Oracle VM VirtualBox 6.1 on Windows 10 Computer
Step 1. Download the VirtualBox 6.1 Installer
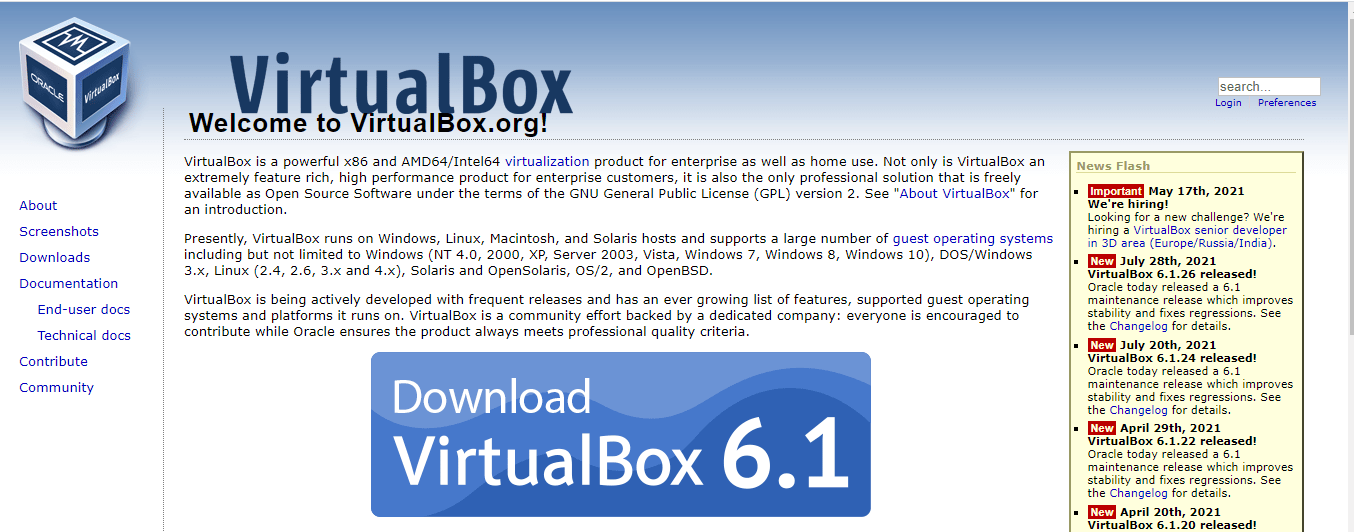
First download the Oracle VM VirtualBox 6.1 installer from the official website. Do remember to download the installer for your host operating system only. Here we will be downloading the installer for Windows 10 64 bit operating system. The link to the official website is given above for your reference. Given below is the screenshot of the download page of the official website. The size of the VirtualBox 6.1 installer application will be approximately 103 MB. The installer file name will be VirtualBox-6.1.26-145957-Win.exe (VirtualBox-Version Number-Build Number-Win.exe).
Step 2. Begin VirtualBox Installation
To begin the installation process executes the installer exe file by double clicking your mouse on it. Next you will be greeted with the first screen as shown below.
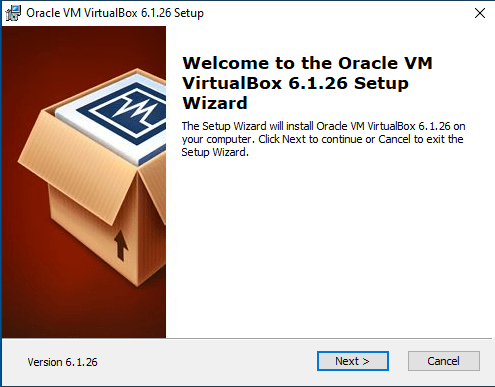
This is Oracle VM VirtualBox setup wizard welcome screen. This setup wizard will guide you throughout the setup process. Furthermore, click on the next button on the bottom right corner of the window to proceed to the next screen.
Step 3. VirtualBox Custom Setup
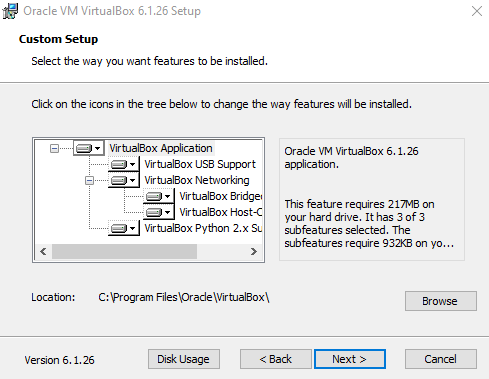
However, this screen is the custom setup screen and here you can select the features of the VirtualBox that you want to install. Additionally, if you want to install some limited features of VirtualBox. Then you can remove those features that you do not want to install. However, for most of the users the default settings will do. Moreover, if you require, you can also change the location of the installation folder of the application in this screen. Further click on the next button to proceed to the next step.
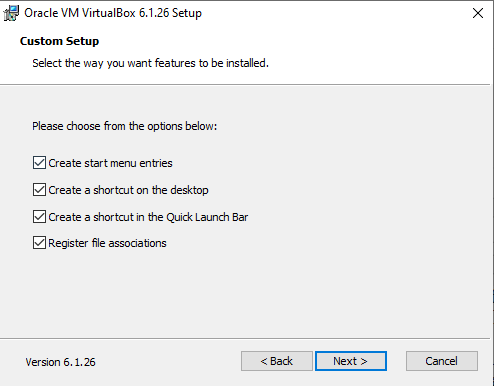
However, there is not much to do in this screen, click on the next button to move on to the next screen as shown below.
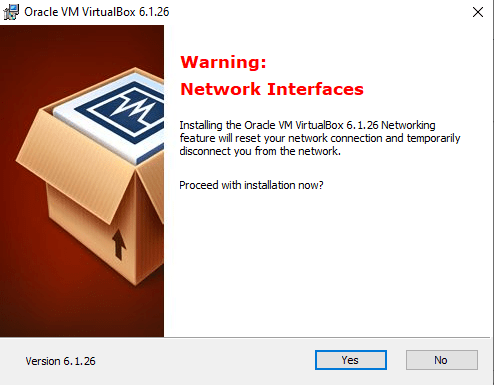
This is simply a warning message from the installation wizard. Furthermore, it will reset your network connection. Moreover, this will temporarily disconnected the machine network. Click on “Yes” button to proceed to the next step.
Step 4. Ready To Install
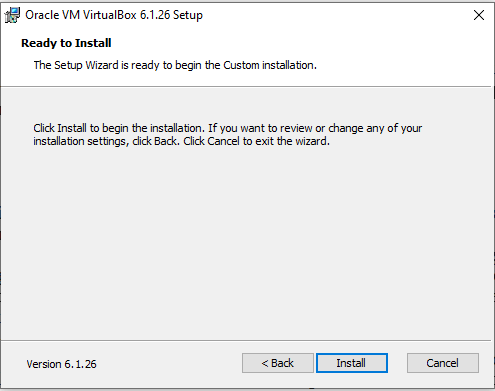
This is the message from the VirtualBox installation wizard that now it is ready to install the application on your system. Additionally, installer Wizard has already collected all the required configuration information. Further click on the “Install” button to move on to the next screen.
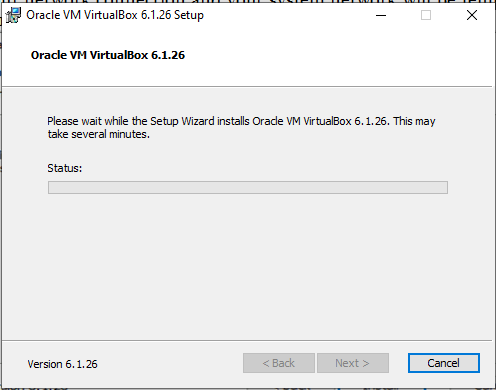
However, the above screen is VirtualBox installation progress screen. Moreover, the installation will take two to three minutes. The installation time will largely depend on the configuration of your computer system. Next we will be greeted with the following screen as shown below.
Step 5. Finishing the Installation
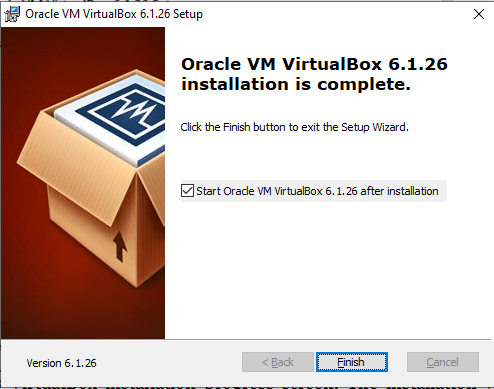
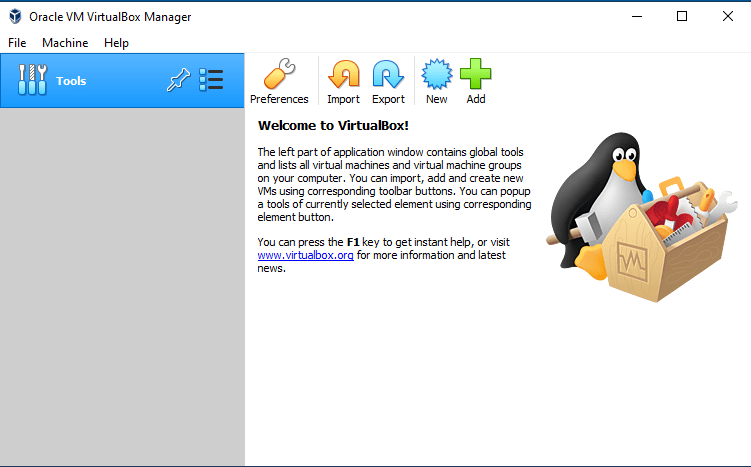
This screen has the message from the VirtualBox installation wizard that the installation is finished. Additionally, if you want to launch the application immediately after the installation do not remove he checkbox in the above screen. Click on the “Finish” button to complete the installation procedure. The VirtualBox will automatically start.
 Install Step 6. VirtualBox Extension Pack
However, the VirtualBox extension pack enables the support for virtual hard disk encryption, Remote Desktop, NVMe and PXE boot for Intel cards, USB 2.0 and USB 3.0 support etc.
Furthermore, to install the VirtualBox extension pack go to the official website of VirtualBox and download the extension pack installer for the all supported operating system platform. Given below is the link to the extension pack download page for your reference.
| The link to the VirtualBox Extension Pack Download Page |
To install the extension pack navigates to the File -> Preference -> Extensions – Add New package. Then click on the + sign and browse for the downloaded extension pack installer file. Select the installer file and click OK to begin the installation. Next, The installation will start and wait for the installation process to complete. After the completion of the installation process click on the OK button to exit from the installer.
This finishes the article How to Install Oracle VM VirtualBox 6.1 on Windows 10 Step by Step with Screenshots.

 Install Step 6. VirtualBox Extension Pack