How to Install phpMyAdmin on Windows 10 Using IIS Web Server
In this tutorial we will learn how to install phpMyAdmin on Windows 10 Using IIS Web Server. However, installation of phpMyAdmin on Windows Server 2016 is similar to installing phpMyAdmin on Windows 10 system. Moreover, instead of using Apache Web Server, we will be using IIS Web Server. Here, in this tutorial we will be installing phpMyAdmin on Windows 10 operating system. However, the installation of phpMyAdmin on Windows Server 2016 is similar as stated above. Also, phpMyAdmin can be used to manage both MySQL Server and MariaDB Database Server.
Here, in this tutorial we will use only MySQL Database Server. First we need to install MySQL Database Server and Client on Windows 10 Computer. Then we will be able to access and manage the databases and tables from the command line. Next, to install MySQL Database Server and Client on Windows 10 operating system, you can follow our tutorial, the link to our tutorial is given below:
| Tutorial on How to Install MySQL 8.0 on Windows 10 |
Other Similar Applications
Furthermore, there and many other Graphical User Interface (GUI) applications available to access the databases and tables in MySQL or MariaDB Database. Apart from phpMyAdmin some of these applications are MySQL Workbench, HeidiSQL, and Navicat etc. Navicat is a commercial application and can be purchased from its official website. Whereas, MySQL Workbench and HeidiSQL are open source applications and are freely available to download and install.
Additionally, phpMyAdmin is an open source application. It is a web based interface to access MySQL Databases and tables. As the name suggests phpMyAdmin is developed using PHP language. However, PHP is a server side scripting language. Moreover, it is often used with MySQL or MariaDB Database for website development. The phpMyAdmin is one of the most popular tools for database management. Furthermore, it is free, platform independent and lightweight web application. Also, it is commonly used for management and maintenance of MySQL or MariaDB databases.
In addition to above, in phpMyAdmin we can use its GUI window to write and execute SQL statements. We can also see the output of the SQL statements on the phpMyAdmin output screen. Additionally, using phpMyAdmin we can easily do all administrative functions like taking database backups, restoring database etc.
Prerequisite for Installation of phpMyAdmin on Windows 10
Before installation of phpMyAdmin some preparation has to be done and we will need the following:
- We will need a system with preinstalled Windows 10 or Windows Server 2016 operating system.
- Install MySQL or MariaDB Database Server on Windows to use phpMyAdmin. To install MySQL Database Server on Windows, see our tutorial:
How to Install MySQL 8.0 on Windows 10
If we want to install MySQL on Windows Server, the same installation process will do.
- Install PHP on the system, for installation of PHP on windows using IIS, see our tutorial:
Tutorial on How to Install PHP 8 on Windows 10 - Install FastCGI module on IIS to be able to run PHP websites on IIS. This step is covered in our PHP 8 installation tutorial.
- A stable and fast internet connection for downloading the phpMyAdmin installer.
Now we are ready to install phpMyAdmin on Windows 10 or Windows Server 2016 Using IIS Web Server.
Installing phpMyAdmin on Windows Using IIS Web Server
However, to install phpMyAdmin on Windows 10, first download the phpMyAdmin installer from the official website of phpMyAdmin. Following is the link to the latest version of phpMyAdmin as of writing this article:
| Link of the Official Website of phpMyAdmin for Download of Installer Zip File |
Next, click on the above link to download the installer. Additionally, the installer file will be in zip format. The size of the installer is about 14.1 MB.
Further, extract the installer folder from the zip archive. Next, rename the extracted folder to phpmyadmin. Also, move this extracted folder to the location C:\inetpub\wwwroot\.
Finally, on moving the phpmyadmin folder in C:\inetpub\wwwroot folder, the installation of phpmyadmin on localhost is complete. Now to open phpMyAdmin, we have to open our favorite browser. In the address bar of the browser type the following URL:
http://localhost/phpmyadmin/The output on the browser will be similar to the one shown below:
 Configuration of phpMyAdmin
If we will try to use phpMyAdmin it will give errors. To use phpMyAdmin we have to first configure it. The configuration file can be created with simple text editor. To configure phpMyAdmin, follow the steps given below in the given order:
- Navigate to the C:\inetpub\wwwroot\phpmyadmin folder.
- Locate the configuration file config.sample.inc.php.
- Rename config.sample.inc.php file to config.inc.php.
- Open this file in your favorite text editor.
- Locate the line having content [ $cfg[‘blowfish_secret’] = ”; ]
- Enter some string value in between the quotation marks to the right of the ‘=’ sign as shown below. The recommended length of the string should be 32 characters or more.
     $cfg[‘blowfish_secret’] = ‘askjfneruvhewjnerfhwejnceuihjwjjndomeidmeuemnwidnwi’;
- Save the file and exit the text editor.
- Now open the browser again and enter the URL:
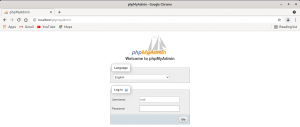
http://localhost/phpmyadmin/On the login page enter the user name as root. Enter the password for the root user. The following screen will appear as shown below.
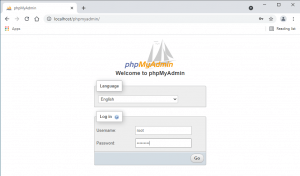
Finally, we are now able to log into the MySQL database Server successfully. But still some configuration part is remaining. We can see there is an error message at the bottom of the window. This is shown in the image below.
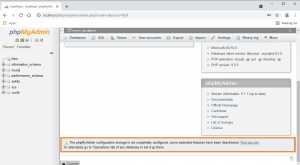
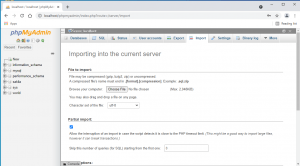
Additionally, to remove the error we will move to the import tab on the top menu of the phpMyAdmin page. Then, we will import create_tables.sql file from sql folder. The sql folder is located inside phpmyadmin folder. The absolute path of the file is:
“C:\inetpub\wwwroot\phpmyadmin\sql\create_tables.sqlâ€.
The following figure shows the import option location on the web page:
 Furthermore, choose create_tables.sql file from the sql folder as explained above in the web page as shown below.
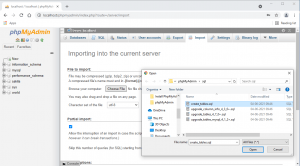
Further, Now click GO button situated at the bottom right hand corner. Also, this will create a phpmyadmin database. Then it will import create table sql file in the phpmyadmin database.
Finally, the phpMyAdmin installation on windows 10 is complete. We can now start using it.
Finally, It is time to log out of phpmyadmin. Then again connect to the database server. Now there will be no errors.

 Configuration of phpMyAdmin