How to Download and Install XAMPP Server on Ubuntu 20.04 LTS
In this tutorial we will learn how to download and install XAMPP Server on Ubuntu 20.04 LTS. However, you can also follow this tutorial if you want to install XAMPP Server on Ubuntu 18.04, Debian 11 / Debian 10 or any other similar Linux distributions.
As we know that XAMPP is an abbreviation for cross-platform (X), Apache (A) server, MariaDB (M), PHP (P) and Perl (P). In fact, XAMPP Server is developed as a local server for testing of web applications on local system or local host. Moreover, it is an open source and free package developed by Apache Friends. In addition to above, XAMPP Server is a cross platform package and it is available for Windows, Linux and MacOS.
XAMPP Server Modules and Applications
However, the XAMPP server package includes Apache web server, MariaDB database server, PHP (a server side scripting language), and Perl programming language. In fact, it is one of the most popular localized LAMP Servers especially among the PHP website developers. Additionally, XAMPP Server provides website developers a much needed web development environment for testing their websites and application tools. Once the testing phase is complete then the website / application is transferred to the production server.
However, if you want to host a website developed using PHP language and MariaDB Database on a Linux server using Apache web server. Then you have to separately install PHP, Mariadb and Apache web server on your Linux (Ubuntu 20.04 in our case) system. This will create the environment for testing and hosting your website. However, the XAMPP Server makes it easy for the developers to build the much needed development environment, as it comprises of all the above needed software packages. Additionally, XAMPP server also has the options to install content management systems like WordPress and other related application tools like phpMyAdmin, ProFTPD etc.
In the end, we will also discuss the uninstall process of XAMPP Server in detail so that you can easily uninstall the XAMPP Server and all its modules if required for any reason.
Prerequisite for XAMPP Server Installation
- First, we will require a Desktop / Laptop with pre-installed Ubuntu 20.04 LTS Focal Fossa. To install Ubuntu 20.04 LTS Focal Fossa on your Desktop / Laptop, you can follow our tutorial. Below given is the link to our tutorial.
| How to Install Ubuntu 20.04 LTS Focal Fossa |
- Additionally, we will need a stable and fast internet connection to download and install XAMPP Server Package from the official website of Apache Friends.
Download the XAMPP Server Installation Package for Linux
Now we are ready to download the XAMPP Server installation package for Linux from the official website of Apache Friends. Below given is the link and screenshot of the download page of the official website of Apache Friends.
https://www.apachefriends.org/index.html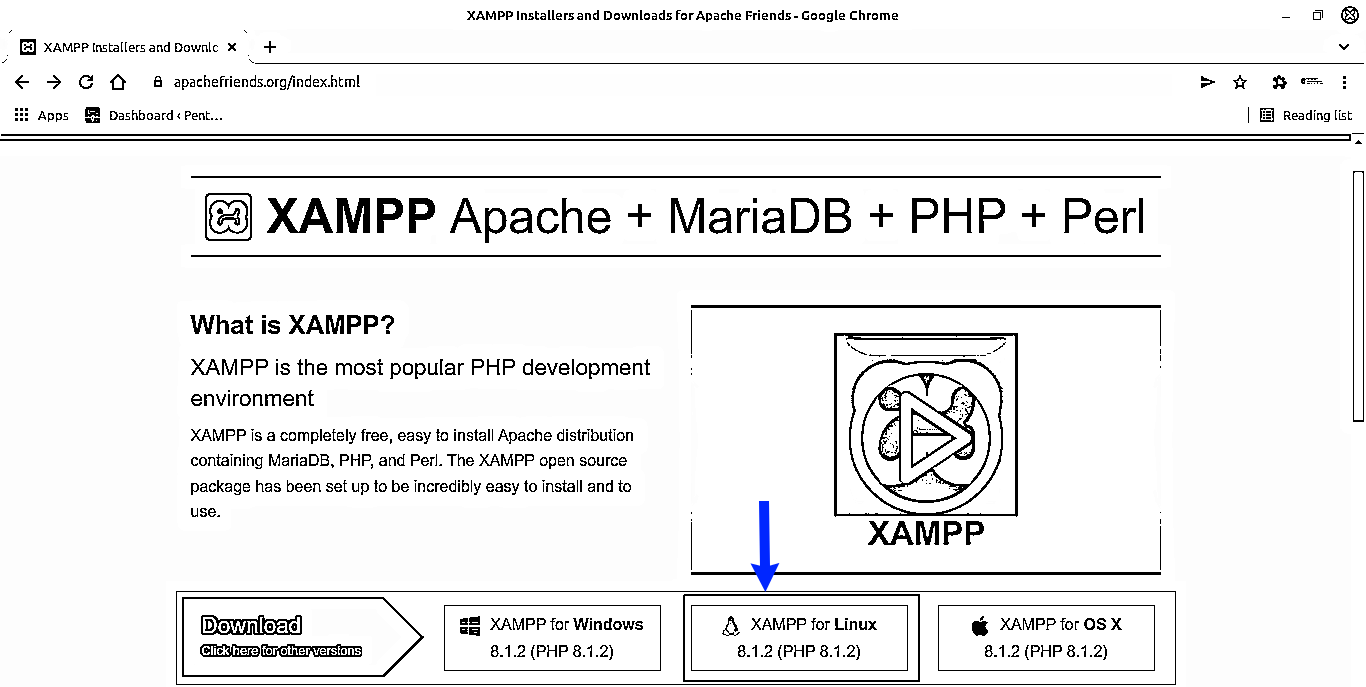
However, at the time of writing this article the latest PHP version supported by XAMPP Server is PHP 8.1.2. Therefore to install the latest XAMPP package we will click on the button XAMPP for Linux 8.1.2 (PHP 8.1.2) as shown in the above figure. On clicking the button the XAMPP installer package download will begin. Moreover, it is recommended to save the downloaded package file on the local disk by selecting the save file option in the browser. By default, the installer application will be saved in the “Downloads” folder on your computer system.
Installation of XAMPP Server on Ubuntu 20.04 LTS
Next, we will be using the terminal window of the Ubuntu 20.04 LTS Operating System for the installation of XAMPP Server. Therefore to open the terminal window navigate to dash and click on Terminal icon or you can use the shortcut “ctrl-alt-T” to open the terminal window.
After the opening of terminal window issue the following command to navigate to the Downloads folder.
cd ~/DownloadsNow make the downloaded application file executable by issuing the following command in the terminal window.
chmod +x xampp-linux-x64-8.1.2-0-installer.runHowever, “xampp-linux-x64-8.1.2-0-installer.run” is the downloaded installer file name. In your case this file name may be different. Therefore you should provide the downloaded file name as the argument to the chmod command. Now the downloaded package will change to installable executable file. Below given screenshot displays the file permissions before and after running the chmod command.

We have tested the whole installation process on Ubuntu 20.04 LTS Focal Fossa operating system.
Start the XAMPP Server Setup Wizard
Now login as root user or use sudo command and run the following command in the terminal window.
sudo ./ xampp-linux-x64-8.1.2-0-installer.runOn running the above command you will be greeted with the welcome screen of XAMPP Server installer. Below given screenshot shows the terminal command as well as the welcome screen of XAMPP Server Installer.
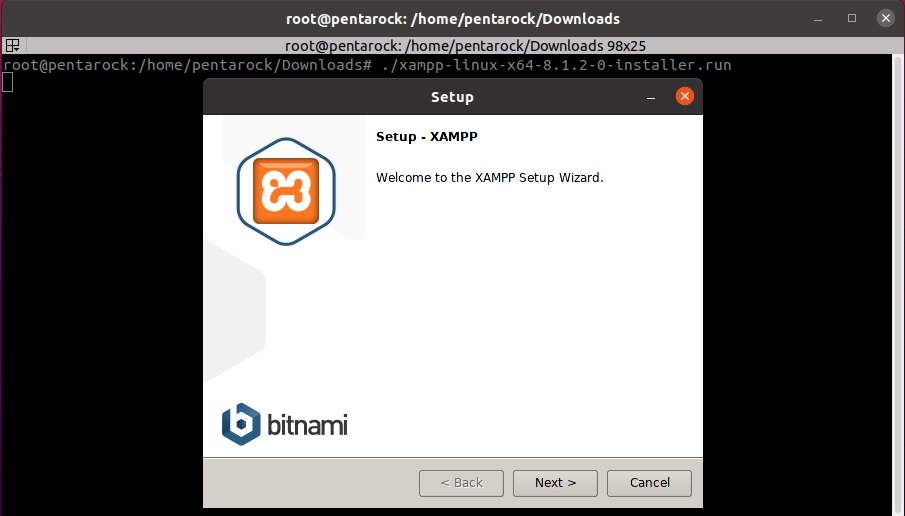
This welcome screen is a graphical setup wizard of XAMPP Server. This will guide you through the rest of the setup process. Click next button to proceed to the next step.
Component Selection Screen
The next screen is component selection screen. This screen shows the components of the XAMPP server that will be installed. Do not change the default selection and click next button to move to the next step.
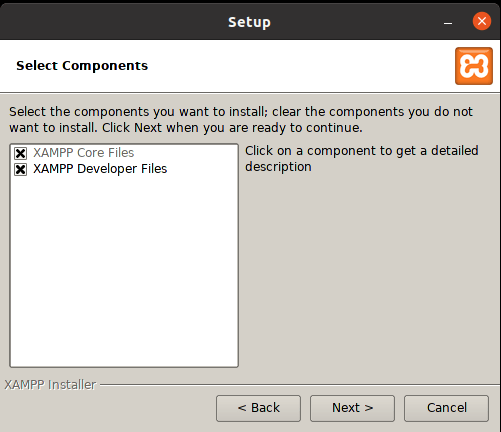
Select Default Installation Directory
The next screen will show the application installation folder. Leave this to default and click next button to move to the next step.
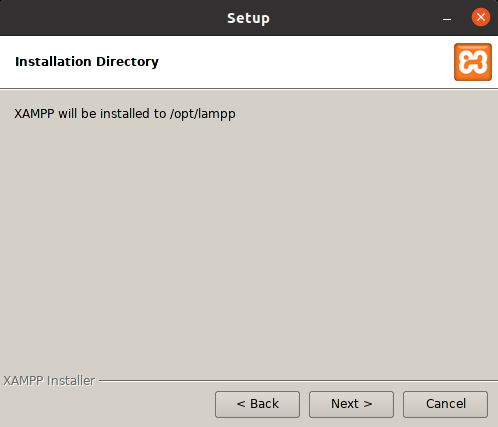
Bitnami for XAMPP Screen
This screen is an informative screen and shows that Bitnami provides free installers for CMS systems like WordPress, Drupal, Joomla etc. Next click the next button to proceed to the next step.
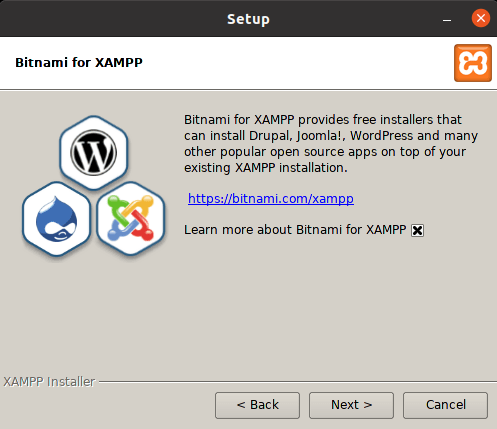
The next screen displayed is ready to install screen. Click next button to continue the installation process.
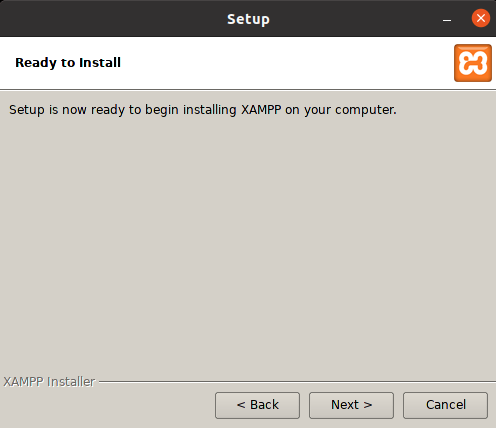
The installation process will begin and it will take 5 to 10 minutes for installation to complete. The installation time depends on the configuration of your computer system.
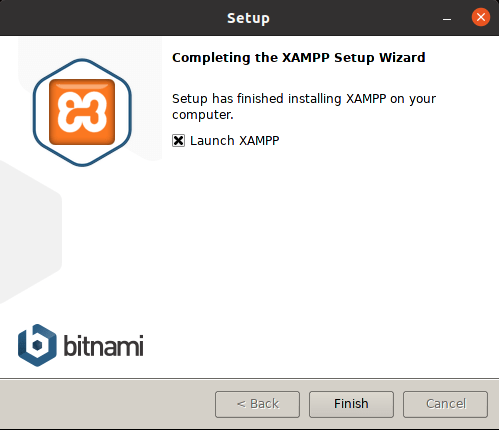
Now click finish button to complete the installation and exit from the installation wizard.
XAMPP Server launcher Screen
While leave the Launch XAMPP checkbox checked. After finishing the installation the XAMPP manager welcome screen will appear on the display as shown below.
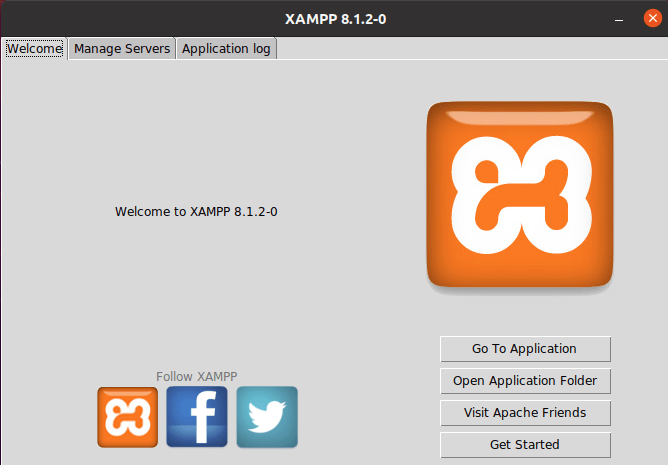
There are three tabs Welcome, Manage Servers and Application log on the welcome screen. Click on the Manage Servers Tab. Following screen will appear on the display.
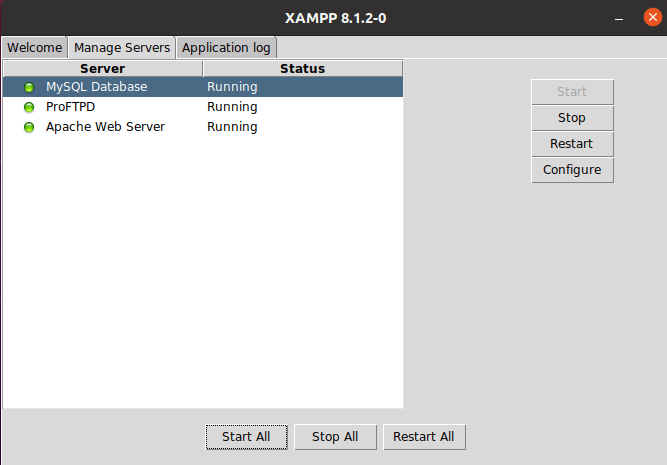
From the Manage Servers window you can start and stop servers individually. You can Start and Stop All the services by clicking on Start All and Stop All buttons given at the bottom of the screen. However, you can also configure the servers by clicking on the Configure button provided on the top right corner of the screen.
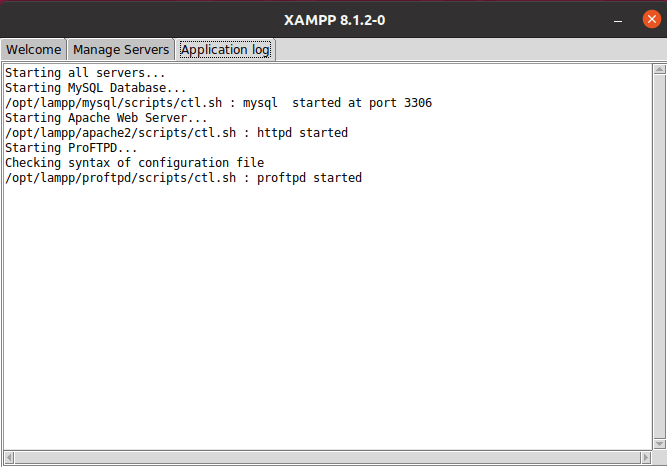
You can also view the application log by clicking on the Application log tab in the launcher screen. Below given is the screenshot of the application log screen.
How to Create XAMPP Server Launcher
First open terminal windows and loging as su or root user. To create XAMPP Server launcher first navigate to the “/usr/share/applications” folder.
sudo cd /usr/share/applicationsIn the “/usr/share/applications” folder create a file xampp.desktop in your favorite text editor. We are using nano editor.
sudo nano xampp.desktopNow copy the following text in the xampp.desktop and save and exit the editor.
[Desktop Entry]
Encoding=UTF-8
Name=XAMPP Control Panel
Comment=Start and Stop XAMPP
Exec=sudo /opt/lampp/manager-linux-x64.run
Icon=/opt/lampp/htdocs/favicon.ico
Categories=Application
Type=Application
Terminal=true
The XAMPP Server launcher is created. Navigate to dash and launch the XAMPP Server.
Verify XAMPP Server Installation
To verify the XAMPP Server installation on Ubuntu 20.04 LTS, open your favorite browser and type the following URL in the address bar.
http://localhostIf XAMPP Server is correctly installed and running on your system, then following webpage will appear on your screen.

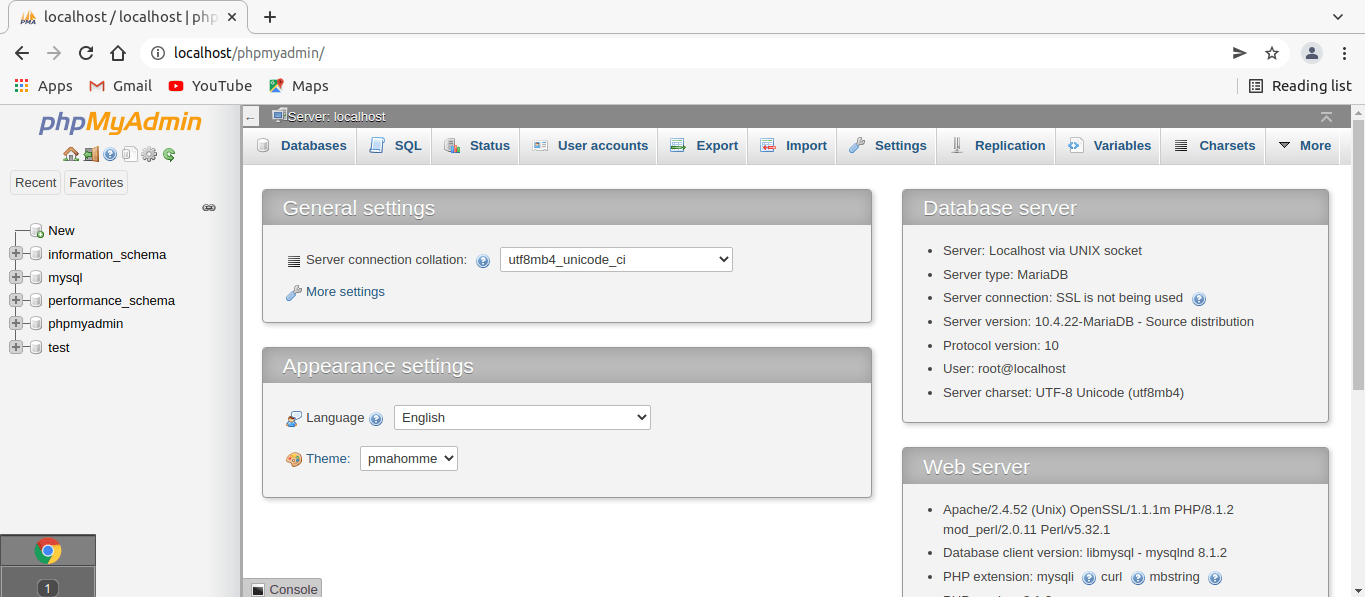
Similarly, you can verify the installation of phpMyAdmin by navigating to the following URL in your favorite browser:
http://localhost/phpmyadminThe screenshot of the resulting web page is given below. This verifies that phpMyAdmin is successfully installed and running on your computer.
XAMPP Server Uninstall Process
As discussed in the beginning of the article, we will now see how to completely uninstall XAMPP Server from our Ubuntu 20.04 LTS system if we require.
First, launch the Ubuntu 20.04 Terminal Window and navigate to the directory where XAMPP Server is installed. Below given is the default XAMPP Server directory.
cd /opt/lamppIn this directory check for the uninstall file. Now execute this uninstall file in the terminal window. Execute the following command.
sudo ./uninstallBelow given is the screenshot of the dialog box that will appear confirming to uninstall XAMPP Server and all of its modules.
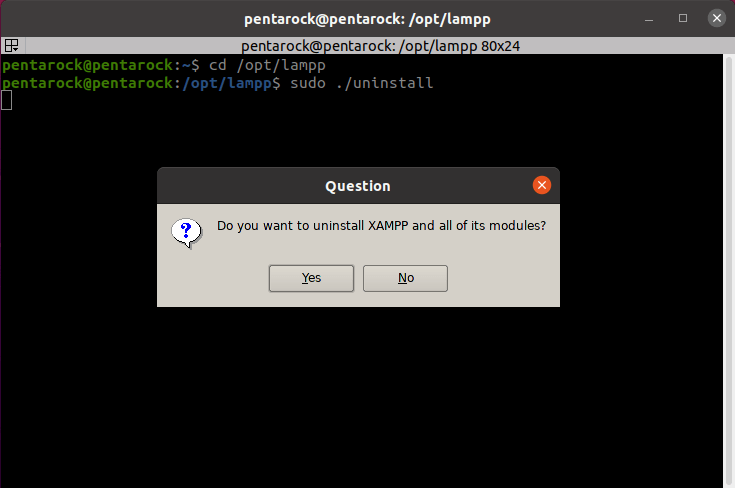
Click on the “yes” button in the dialog box to continue the removal of XAMPP Server and all its modules from your Ubuntu 20.04 computer. The uninstall process will begin and after the completion of the uninstall process following dialog box will appear on the screen.
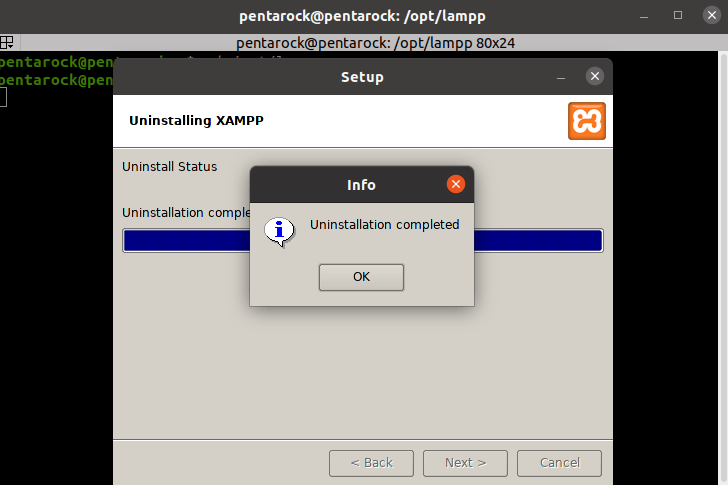
Simply click on OK button to complete the uninstall process. Finally to remove the leftover files remove the folder /opt/lamp. To do this issue the following command in the terminal window.
sudo rm –r /opt/lampThis finally deletes all the modules of XAMPP Server along win any leftover files and folders. You can also delete the downloaded installer file if needed.
Conclusion
This completes how to download and install XAMPP Server on Ubuntu 20.04 LTS system. Enjoy!
How to Download and Install XAMPP Server on Ubuntu 20.04 LTS


