How to Install Laravel with LAMP on Ubuntu 20.04 LTS Focal Fossa

In this tutorial we are going to learn how to install Laravel with LAMP on Ubuntu 20.04 LTS Focal Fossa. However, Laravel is one of the most popular PHP language frameworks. Additionally, it is an open source PHP web framework. It is based on Model View Controller (MVC) architecture. Laravel was designed for web application development. However, it is best fit for not only enterprise level development but it is also good choice for small project development.
Laravel was created by Taylor Otwell as a better alternative to Codeigniter. However, it is a new framework, having big potential to become one of the most popular PHP frameworks. Moreover, Laravel has a huge community of developers and users. In addition to above, it has the most detailed online manual and documentation. Moreover, lot of help and study material is already available on the internet.
This tutorial expects a basic knowledge of Linux from the user along with some knowledge of PHP and related technologies for installation of Laravel 8.x. This tutorial will work well for Ubuntu 16.04, Ubuntu 18.04 and other Debian based Linux distributions also.
Prerequisite for Installation of Laravel on Ubuntu 20.04 LTS
- First we will need a laptop or a desktop computer with Ubuntu 20.04 installed on it. If you want to learn how to install Ubuntu 20.04, then follow the link to our tutorial as given below.
| How to Install Ubuntu 20.04 LTS Focal Fossa |
- We will also require preinstalled LAMP Stack on Ubuntu 20.04. LAMP stack is an abbreviation for Linux, Apache, MySQL and PHP. Therefore we will be installing Apache2 web server, PHP 7.2 or higher and MySQL / MariaDB Database Server. PHP 7.2 or higher is needed for Laravel 8.x installation.
- We will also need a user with sudo privileges for installation of Applications.
- We will also require a stable and fast internet connection for downloading and installing the various applications.
| How to Install LAMP on Ubuntu 20.04 with Screenshots |
Update Ubuntu 20.04 LTS
Before any installation it is best to update the Ubuntu 20.04 LTS operating system. Issue the following command in the terminal window to update Ubuntu 20.04.
sudo apt updatesudo apt upgradeInstall Apache2 Web Server on Ubuntu 20.04 LTS
Laravel is used for creation of web applications. We will require a web server to run the web application. For this we will use Apache2 Web Server which is one of the most popular web servers. To install Apache2 Web Server, open the terminal window and issue the following command.
sudo apt install apache2The output of the above command will be similar to the displayed below.
| sudo apt install apache2 Reading package lists… Done Building dependency tree Reading state information… Done The following additional packages will be installed: apache2-bin apache2-data apache2-utils libapr1 libaprutil1 libaprutil1-dbd-sqlite3 libaprutil1-ldap liblua5.2-0 Suggested packages: apache2-doc apache2-suexec-pristine | apache2-suexec-custom The following NEW packages will be installed: apache2 apache2-bin apache2-data apache2-utils libapr1 libaprutil1 libaprutil1-dbd-sqlite3 libaprutil1-ldap liblua5.2-0 0 upgraded, 9 newly installed, 0 to remove and 0 not upgraded. Need to get 1,820 kB of archives. After this operation, 7,945 kB of additional disk space will be used. Do you want to continue? [Y/n] |
After the affirmative answer the above prompt, it will take 2 minutes to install apache2 Web Server on our Ubuntu 20.04 LTS.
After the installation enable and start apache2 web server by issuing the following command in the terminal window.
sudo systemctl start apache2sudo systemctl enable apache2
The output of the above command will be similar to the shown below.
| Synchronizing state of apache2.service with SysV service script with /lib/systemd/systemd-sysv-install. Executing: /lib/systemd/systemd-sysv-install enable apache2 |
Now is the time to verify that the apache2 web service is enabled and started. To check this issue the following command in the terminal window.
sudo systemctl status apache2The output of the command will be similar to the given below.
sudo systemctl status apache2
Loaded: loaded (/lib/systemd/system/apache2.service; enabled; vendor prese> |
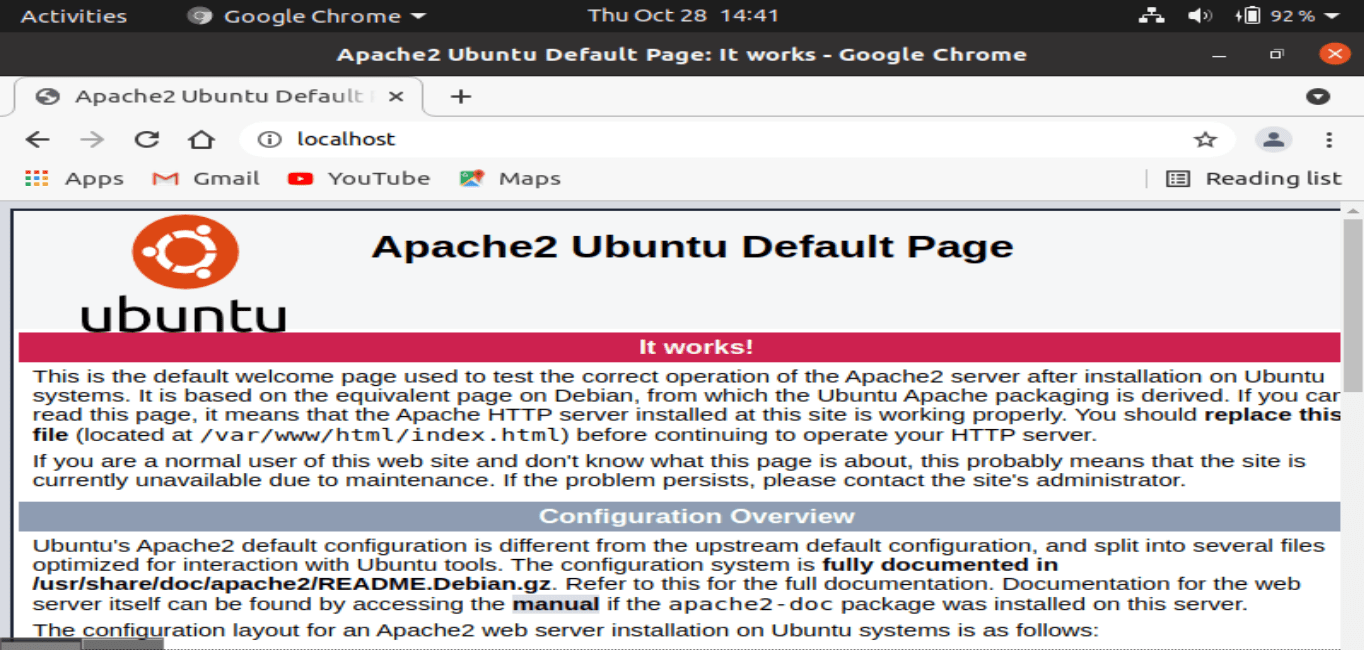
We can also verify apache2 web server running status by opening our favorite browser and entering the ip address of the system or by simply typing localhost in the address bar of the browser. The output of the above will be similar to the given below figure.

Now we have successfully installed apache2 web server. Now we will install PHP 7.4 and all its required extensions.
Install PHP 7.4 and the required extensions on Ubuntu 20.04
To install PHP 7.4 with the required extensions on Ubuntu 20.04 LTS, open the terminal window and issue the following command as shown below.
sudo apt install php7.4 libapache2-mod-php7.4 php7.4-bcmath php7.4-json php7.4-mbstring php7.4-xml php7.4-zip
The output of the above command will be similar as shown in the figure below.
| Reading package lists… Done Building dependency tree Reading state information… Done The following additional packages will be installed: libonig5 libzip5 php-common php7.4-cli php7.4-common php7.4-opcache php7.4-readline Suggested packages: php-pear The following NEW packages will be installed: libapache2-mod-php7.4 libonig5 libzip5 php-common php7.4 php7.4-bcmath php7.4-cli php7.4-common php7.4-json php7.4-mbstring php7.4-opcache php7.4-readline php7.4-xml php7.4-zip 0 upgraded, 14 newly installed, 0 to remove and 0 not upgraded. Need to get 4,735 kB of archives. After this operation, 20.4 MB of additional disk space will be used. Do you want to continue? [Y/n] |
After the affirmative response to the above, it will take 2 to 3 minutes depending on your internet speed and computer configuration to complete the PHP 7.4 installation along with its required extensions. After the installation of PHP 7.4 we can verify the installation by issuing the following command in the terminal window.
php –vThe output of the above command will be similar to the given below.
| php -v PHP 7.4.3 (cli) (built: Oct 25 2021 18:20:54) ( NTS ) Copyright (c) The PHP Group Zend Engine v3.4.0, Copyright (c) Zend Technologies with Zend OPcache v7.4.3, Copyright (c), by Zend Technologies |
Now restart the apache2 web server to update the changes made to the Ubuntu 20.04. To restart the apache2 web server issue the following command in the terminal window.
sudo systemctl restart apache2
| How to Install MariaDB 10 on Ubuntu 20.04 |
Install MySQL Server on Ubuntu 20.04 LTS
To install MySQL Server on Ubuntu 20.04 LTS, issue the following command in the terminal window.
sudo apt install mysql-server php7.4-mysqlThe output of the above command is shown below in the figure.
| Reading package lists… Done Building dependency tree Reading state information… Done The following additional packages will be installed: libaio1 libcgi-fast-perl libcgi-pm-perl libevent-core-2.1-7 libevent-pthreads-2.1-7 libfcgi-perl libhtml-template-perl libmecab2 mecab-ipadic mecab-ipadic-utf8 mecab-utils mysql-client-8.0 mysql-client-core-8.0 mysql-server-8.0 mysql-server-core-8.0 Suggested packages: libipc-sharedcache-perl mailx tinyca The following NEW packages will be installed: libaio1 libcgi-fast-perl libcgi-pm-perl libevent-core-2.1-7 libevent-pthreads-2.1-7 libfcgi-perl libhtml-template-perl libmecab2 mecab-ipadic mecab-ipadic-utf8 mecab-utils mysql-client-8.0 mysql-client-core-8.0 mysql-server mysql-server-8.0 mysql-server-core-8.0 php7.4-mysql 0 upgraded, 17 newly installed, 0 to remove and 0 not upgraded. Need to get 31.7 MB of archives. After this operation, 262 MB of additional disk space will be used. Do you want to continue? [Y/n] Y |
After the affirmative response to the above MySQL Server will be installed in just 2 to 3 minutes.
After the completion of the installation issue the following command to secure the MySQL installation.
sudo mysql_secure_installationThe output of the above command will be similar to given below.
| sudo mysql_secure_installation Securing the MySQL server deployment. Connecting to MySQL using a blank password. VALIDATE PASSWORD COMPONENT can be used to test passwords and improve security. It checks the strength of password and allows the users to set only those passwords which are secure enough. Would you like to setup VALIDATE PASSWORD component? Press y|Y for Yes, any other key for No: n Please set the password for root here. New password: Re-enter new password: By default, a MySQL installation has an anonymous user, allowing anyone to log into MySQL without having to have a user account created for them. This is intended only for testing, and to make the installation go a bit smoother. You should remove them before moving into a production environment. |
Install Composer on Ubuntu 20.04 LTS
However, open the terminal windows and issue the following command in the terminal window to install composer on Ubuntu 20.04
sudo curl -sS https://getcomposer.org/installer | phpsudo mv composer.phar /usr/local/bin/composersudo chmod +x /usr/local/bin/composerDownload and Install Laravel 8.x on Ubuntu 20.04 LTS
However, the latest Laravel version is always updated under the Github repository. Moreover, issue the following command in the terminal window to clone the master branch of the Laravel from the GitHub repository. However, if git is not installed on your system then to install git issue the following command in the terminal window.
sudo apt install gitsudo cd /var/www git clone https://github.com/laravel/laravel.gitThe output of the above command will be similar to the given below.
| Cloning into ‘laravel’… remote: Enumerating objects: 32682, done. remote: Counting objects: 100% (177/177), done. remote: Compressing objects: 100% (124/124), done. remote: Total 32682 (delta 84), reused 107 (delta 45), pack-reused 32505 Receiving objects: 100% (32682/32682), 10.04 MiB | 3.61 MiB/s, done. Resolving deltas: 100% (19324/19324), done. |
Now switch to the Laravel folder and install all the dependencies required for the Laravel framework. To do this issue the following command in the terminal window.
cd /var/www/laravelsudo composer installAdditionally, the installation will take some time depending on your network speed and computer configuration. After successfully installing all the dependencies, set the proper permissions on the files. To do this issue the following command in the terminal window.
sudo chown -R www-data.www-data /var/www/laravelsudo chmod -R 755 /var/www/laravel
sudo chmod -R 777 /var/www/laravel/storageCreate Environment Settings
However, to create environment settings issue the following command in the terminal window.
sudo mv .env.example .envNow generate base64 random number encryption key. This will be used by the Illuminate encrypter service. Issue the following command to generate the key.
sudo php artisan key:generateNow edit the .env configuration file and update the required settings. Also, make sure APP_KEY is properly set as generated in the above command.
sudo nano .envCreate MySQL User and Database and enter the values in the .env file.
To run Laravel issue the following command in the terminal window.
sudo php artisan serveThe output will be similar to given below.
| php artisan serve Starting Laravel development server: http://127.0.0.1:8000 [Thu Oct 28 15:42:27 2021] PHP 7.4.3 Development Server (http://127.0.0.1:8000) started [Thu Oct 28 15:43:33 2021] 127.0.0.1:40116 Accepted [Thu Oct 28 15:43:34 2021] 127.0.0.1:40116 Closing [Thu Oct 28 15:43:34 2021] 127.0.0.1:40120 Accepted [Thu Oct 28 15:43:34 2021] 127.0.0.1:40120 [200]: GET /favicon.ico [Thu Oct 28 15:43:34 2021] 127.0.0.1:40120 Closing |
Now open your browser and enter the following in the address bar.
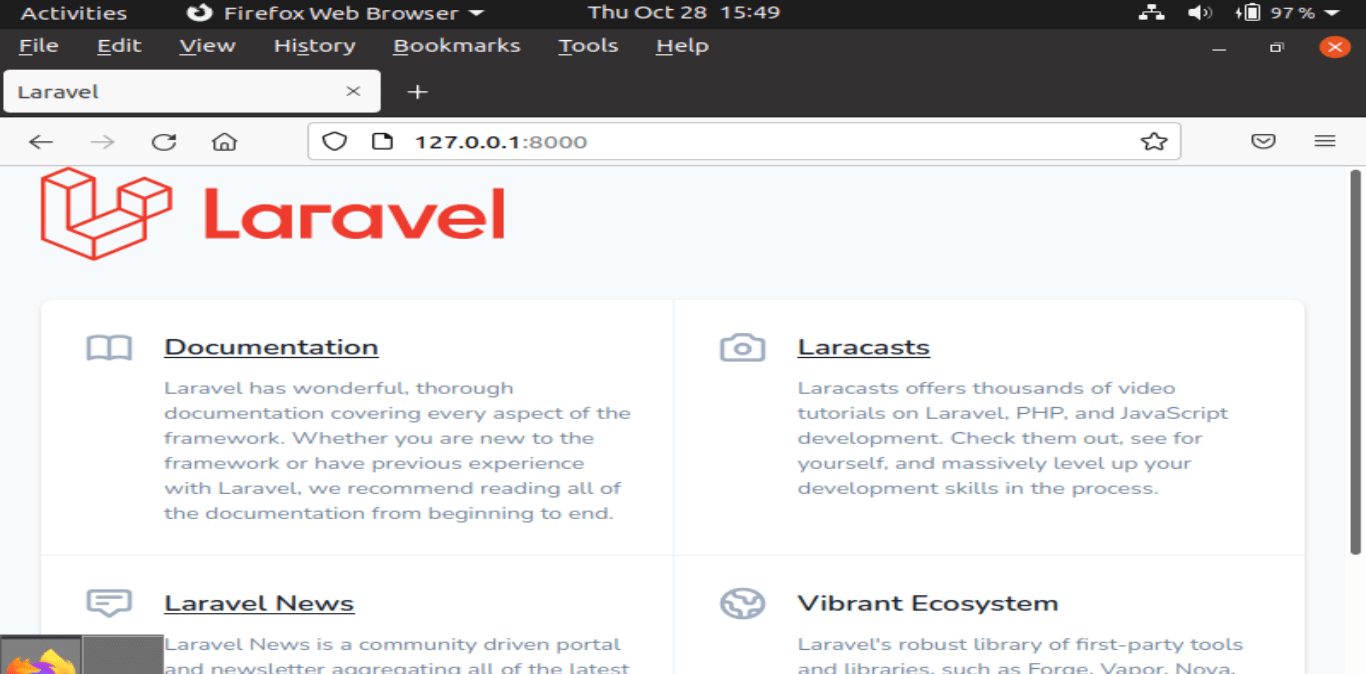
http://127.0.0.1:8000You will see the output similar to the given below.

Now we have installed Laravel successfully. Enjoy!
How to Install Laravel with LAMP on Ubuntu 20.04 LTS Focal Fossa


