How to Install WordPress on Ubuntu 20.04 LTS
In this article we will see, How to Install WordPress on Ubuntu 20.04 LTS Focal Fossa. However, WordPress is an open source and free content management system. Moreover, it is one of the most widely used platforms for website development. Additionally, according to the developers of the WordPress currently more than 40 percent of the websites on the internet are powered by WordPress.
Easy to Learn
Although, WordPress is easy to learn and requires no programming skills. Using WordPress we can create a blog, a news website, an e-commerce website etc. In short we can make all types of website using WordPress.
Themes & Plugins
In addition to above, there are numerous free and paid websites themes and plugins for WordPress are available. Moreover, Using these themes and plugins we can easily create a professional looking website in no time. Even there are plugins available to optimize the performance of WordPress website.
Additionally, WordPress is platform independent and can be installed on all the major Linux distributions, Windows operating system and MacOS.
PHP & MySQL at Backend
Although, at the backend of the WordPress programming language is PHP and the Database is MySQL along with the use of HTML and CSS. Also, We can enhance, extend or modify WordPress by adding our own code or by using the plugins available. We can also change the design part by modifying the HTML and CSS Code directly in the wordpress code file.
Although, in place of MYSQL Database we can also use MariaDB Database. Earlier MySQL was free and opensource Database Server, but later on it was acquired by Oracle Corporation. Now Oracle Corporation maintains two editions of MySQL Database Server. The first one is Enterprise Edition which is a commercial version and can be purchased from the website of Oracle Corporation. The second one is Community Edition which is free and opensource version of MySQL Database Server. Here, in this article we will be using the Community Version of MySQL Database.
Indeed, WordPress has a large community base and lots of help material is available on its community forums. This is very helpful for the beginners.
Pre-requisite
To install WordPress on Ubuntu, pre-installed LAMP Stack is the pre-requisite. A LAMP Stack comprises of Apache Web Server, MySQL Database Server and PHP programming language installed on a Linux System.
To install LAMP Stack on Ubuntu 20.04 you may visit the link given below.
| Install LAMP Stack on Ubuntu 20.04 LTS |
Assuming that the LAMP Stack is already installed and configured, let us start the installation of WordPress.
Download the WordPress Installer – Install WordPress on Ubuntu
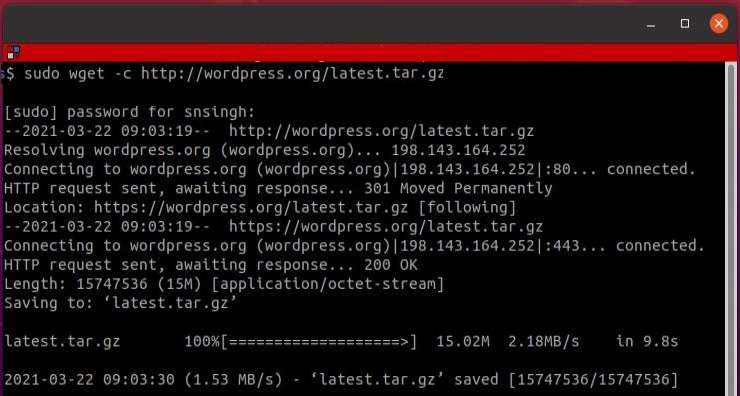
To download the WordPress Installer file from the official website of WordPress, open the terminal window and execute the following command. This will download the latest version of WordPress Installer file.
wget -c http://wordpress.org/latest.tar.gz

Extract the Installer File – Install WordPress on Ubuntu
After the download is finished, extract the WordPress Installer by executing the below given command in the terminal windows. This will extract the installer in WordPress folder.
tar -xzvf latest.tar.gz

Copy and Rename the WordPress Folder
Now copy the WordPress folder to the document root of your system and rename it to your website’s name.
You can create more than one websites on your system by just extracting the WordPress installer again and copying and renaming the WordPress Installer to the new website name and configuring the installer as described below.
Now to copy and rename the installer execute the following command in the terminal window.
sudo cp -R wordpress /var/www/html/.sudo mv /var/www/html/wordpress /var/www/html/yoursite.comHere you can change the website name yoursite.com with your website name.
Change the Ownership and Permissions of yoursite.com Folder
To provide the right permissions and ownership on the website execute the below given commands in the terminal window. The website folder should be owned by the Apache Webserver’s user and group, that is www-data.
sudo chown -R www-data:www-data /var/www/html/yoursite.comsudo chmod -R 775 /var/www/html/yoursite.comCreate Database and Database User for WordPress Website
For creating Database and User in MySQL, open terminal and login with the root user account.
sudo mysql -u root –pAfter successful login create website’s database and database user. Give privileges on database to the new user.
To do this execute the following commands.
mysql> CREATE DATABASE yoursite_data;
mysql> CREATE USER 'yoursite_user'@'localhost' IDENTIFIED BY 'Abcd@1234';
mysql> GRANT ALL PRIVILEGES ON yoursite_data.* TO 'yoursite_user'@'localhost';
mysql> FLUSH PRIVILEGES;
mysql> exit;

Now move to the document root folder of your website yoursite.com.
cd /var/www/html/yoursite.comMove (rename) the configuration file wp-congig-sample.php to wp-config.php.
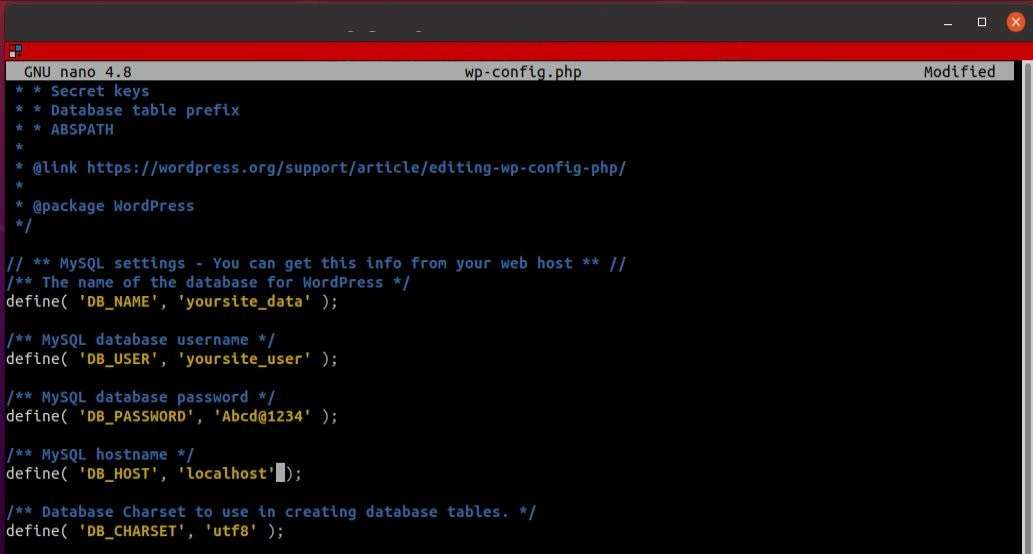
sudo mv wp-config-sample.php wp-config.phpOpen wp-config.php file in text editor and enter the database name, database user and database password in the file. Save the file and exit from the editor as shown in the below given figure.
Create Virtual Host in Apache Web Server for Website
Now you have to configure Apache Web Server, so that it can server your website. To do this move to apache configuration folder. Create a new configuration file in the name of your website, example.com.
sudo nano yoursite.com.confNow type the text as shown below in the file and save and exit the editor.
<VirtualHost *:80>
        ServerName        yoursite.com
        ServerAdmin        webmaster@localhost
        DocumentRoot    /var/www/html/yoursite.com
        ErrorLog              ${APACHE_LOG_DIR}/error.log
        CustomLog          ${APACHE_LOG_DIR}/access.log combined
</VirtualHost>
Now verify and enable the apache2 configuration. To do this execute the following commands in the terminal in the given order.
sudo a2ensite yoursite.com.confsudo systemctl reload apache2Disable the apache2 default configuration to enable the proper loading of yoursite.com website. Execute the following commands in the terminal.
sudo a2dissite 000-default.confsudo systemctl reload apache2Start WordPress Installation – Install WordPress on Ubuntu
Now open your browser and type http://yoursite.com
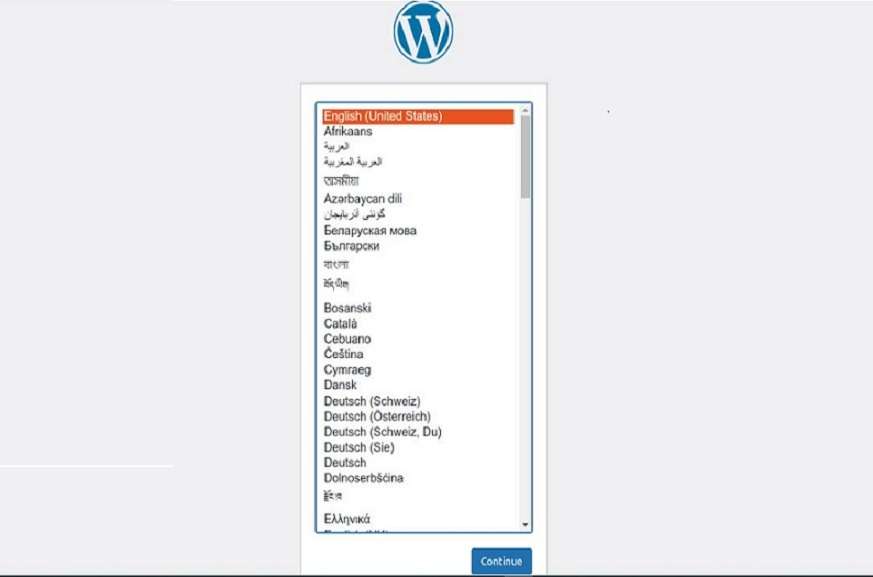
The first screen shows a list of languages to select. Select your language and click continue to proceed.
In the next screen you have to provide the following information:
- Your Website Title
- The User Name to Login as Administrative User
- Password for Admin Login
- Your Email ID
Now the configuration is complete and you are ready to install WordPress on your system.
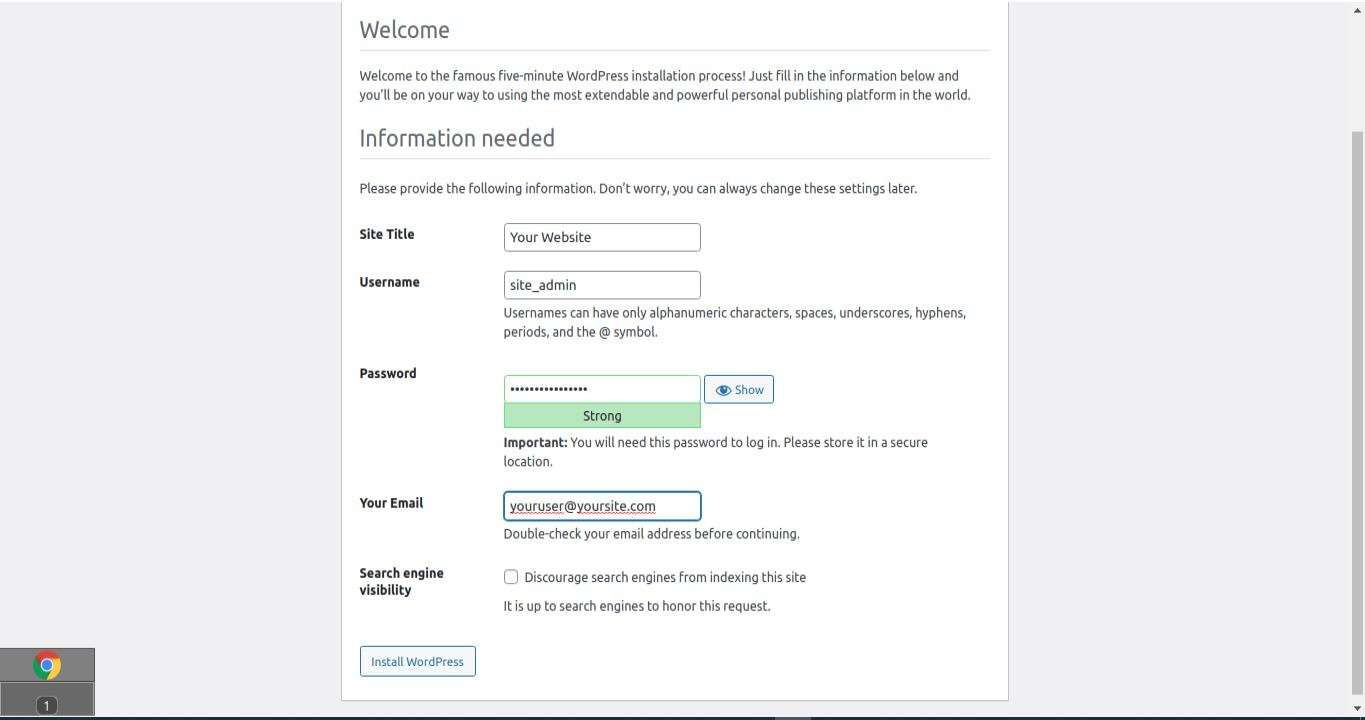
Now, click Install WordPress.
This will take some time to finish the WordPress installation. Once the installation is complete, click on the login button to login as the administrative user. Enter the user name and password and login.
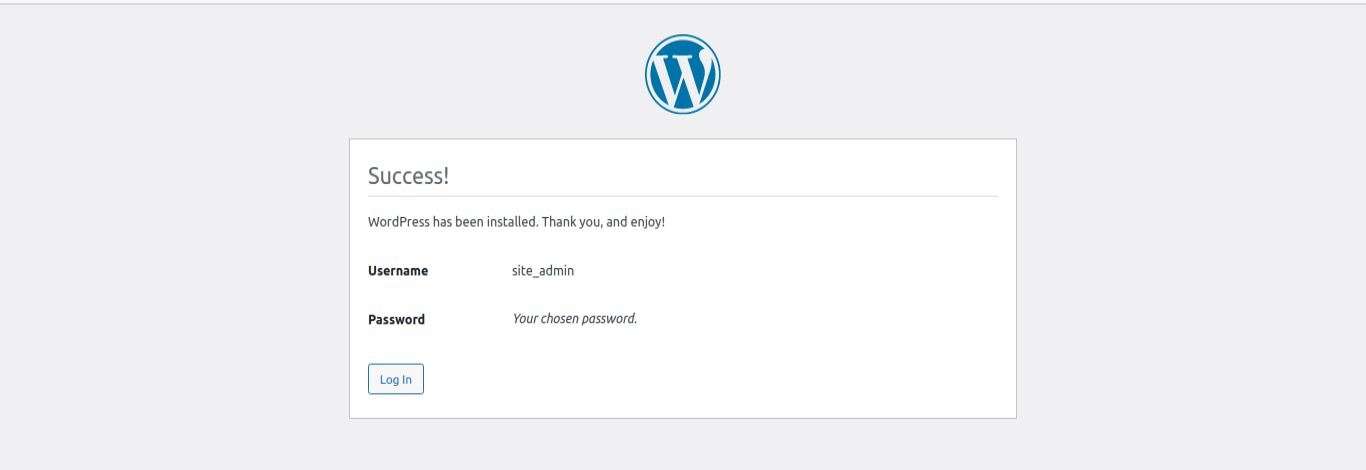
The WordPress dashboard will open and now you can manage your website from here. The below given figure shows the WordPress dashboard.

Now the installation is complete and can login to the admin panel and start website development in WordPress. Enjoy!

