Some Popular Terminal Emulators For Linux

In this article we will have a look on some popular terminal emulators for Linux. Although, almost all the Linux distributions have their own terminal emulators which are installed by default with the operating system. Basically all the terminal emulators provide a command line interface to interact with the operating system. These terminal emulators are graphical applications. Therefore the functions of all the terminal emulators are basically same; the difference is only in the look and feel.
The beauty of the Linux is that you are not bound to use the default terminal emulator installed with the operating system. Or for that matter you can replace any application that is installed by default with the operating system with that one that you like the most. There are many terminal emulators available that are much better in look and feel than these default terminals.
Here is the list of some popular terminal emulators with great features that you can use to have a better user experience.
GNOME Terminal Emulator
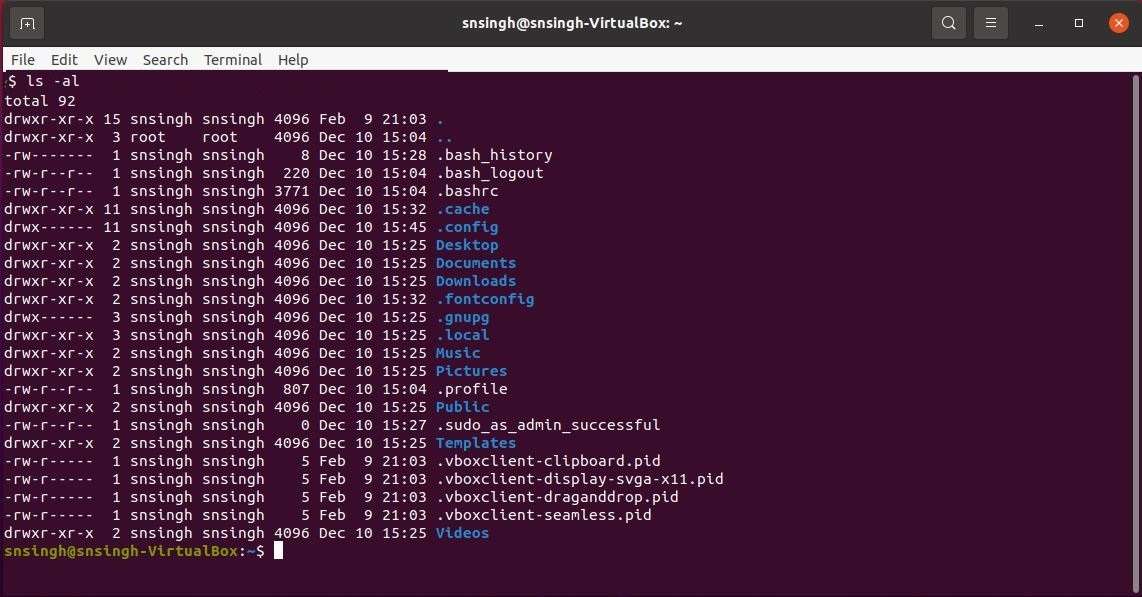
GNOME terminal is the default terminal emulator for many Linux distributions, like Debian, Ubuntu, Fedora, SUSI Linux etc. Terminal emulators are special type of windows that have all the properties of a text editor. We type commands in the terminal window. GNOME Terminal has an interpreter or shell at the backend that executes the commands written in the terminal window.
Functions and Properties
It is a very versatile terminal emulator. It can be customized to our liking. In this article we will discuss how to configure the GNOME to our liking.
It supports tabbed windows very much like the Chrome browser. This helps us to run many sessions as needed in a single instance of the application.
The GNOME has lots of command line switches. To know about all the command line switches available in it, type gnome-terminal –help-all in the terminal window.
It supports Normal, Maximized and minimized window state. Therefore we can switch to any windows state with just a click of mouse or by pressing a single key. For example to go to full screen just press F11 key. We can also zoom in or zoom out through the View menu or by pressing CTRL+ and CTRL-. We can also hide the menu bar by un-ticking the right menu selection item. To display the menu bar, right click mouse button anywhere in the terminal and select Show Menu bar option the popup menu.
If we want to run a command line programs in every startup session of GNOME, we can do this in the following way. Just select Edit | Profile Preferences then move to the Title and Command tab of the configuration window and then select “Run a custom command instead of my shell”. After this type the command to execute.
The terminal settings that are always applied together is called GNOME terminal profile. To see the existing profile, select Edit | Profiles in the menu bar of an open terminal. We can modify the profile by choosing Edit | Profile Preferences. Every tab of the same instance of GNOME terminal may have different profiles.
Official Website: Official Website of GNOME TerminalGuake Terminal
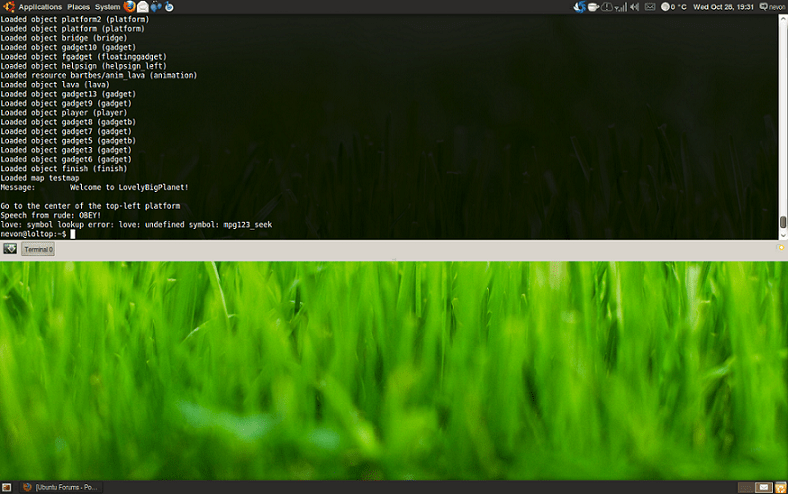
Guake Terminal is a simple and elegant drop-down terminal and it supports most of the popular Linux desktop distributions, like Ubuntu, Debian, Fedora etc.
One of the main objectives of the developers of Guake is to provide and elegant quick-access terminal, that shows and hide on screen with a single key stroke.
The appearance of window of Guake is inspired by fps games and is simple The most part of Terminal Application is written in python and it has a little piece of code in C.
Here in this article we will explain about how to install Guake on Ubuntu distro.
Guake – Functions and Properties
Guake is a Light weight command line terminal. It is simple, easy and elegant terminal with polished integration of the terminal into the GUI. It appears and disappears before the user by pressing a predefined hotkey that is F12 key.
Because the Terminal supports Compiz transparency and it also has support for Multi-tab. It supports plenty of color pallets.
It has customizable hotkeys for tab access, reorganizing, background transparency, font size etc. and it is extremely configurable.
Startup of Guake can be configured by executing a bash script.
It can support multiple monitors and it can save the content on the terminal to a specified file. Therefore it can also open any URL to the default browser in the system.
To Open the Terminal just type “guake” in the window and use F12 key to roll up and roll down the terminal on your system.
Installation Method
To install the Terminal on your Ubuntu Distribution run the following command in your terminal.
sudo apt-get install guakeTo set preferences in the terminal run the following command in the terminal.
Guake --preferencesFor Help in the terminal type the below command.
Guake --helpLink to the official website of Guake and download location
Official Website: Official Website of GuakeKonsole Terminal By KDE
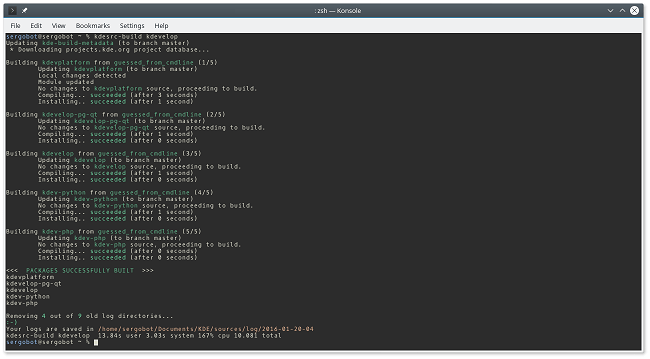
Konsole Terminal is KDE Desktop Environment’s default terminal.
Introduction
This package comprises of the primary xterm characteristics, as well as with more powerful features similar to Windows. This part of the article provides the details of the capabilities of the terminal. It also describes as to how to use these features of Konsole.
The Dolphin File Manger
The F4 function key launches the Dolphin file manager in the Konsole Terminal. Therefore we may press F4 function key to launch the terminal window in a particular folder of the directory structure.
True Color Support
This terminal supports true colors and smooth fonts. This has made the terminal better looking than other terminal emulators.
Speed Matters
Konsole terminal is very fast. It launches instantaneously and it takes less than a second, more precisely between 0.25 to 0.59 seconds to display files of size up to 600 megabytes.
Tabbed View Support
Konsole terminal supports tabbed or split view that cuts the terminal window into more than one konsole terminal instances. This is very convenient feature for the users who do their most of the job on the terminal window and do not want to waste their time navigating from one window to the other windows or tabs.
The terminal can flag secure shell and telnet sessions, folders. It can also launch tabs in any directory for convenient access to it.
Other Features
Konsole can be placed as an icon onto the desktop so that it is always conveniently accessible on desktop windows.
It has the option to save all the screen output in a file.
Konsole terminal records all activities and notifies us through the system notifications when some new activity happens. Scripts can be created and used in this feature. Konsole can notify us for whatever we want.
Settings and profiles may be created, saved, and loaded in Konsole. Numerous color sets, transparency levels, scroll bars, new key binding, startup instruction sets, window border, and menu bars may all be configured in Konsole.
Official Website: Official website of KonsoleTerminator Terminal
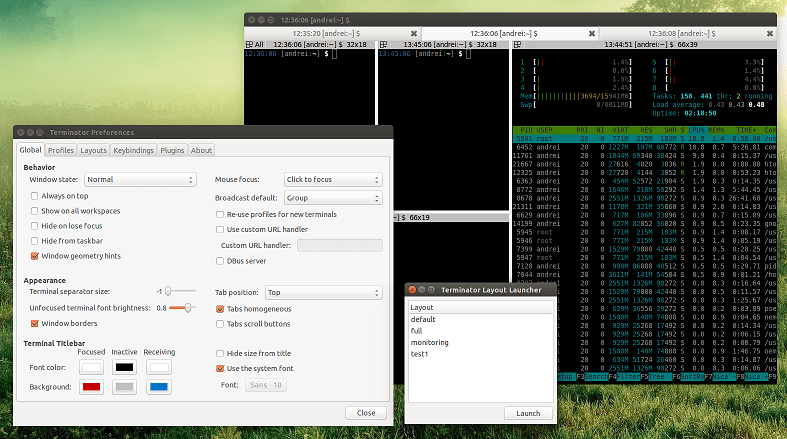
In simple terms Terminator is a terminal emulator just like xterm, gnome-terminal, Konsole, etc. It is important to note that the main objective of the project was to create a powerful and functional application for managed layout of terminals. Terminator was first developed by Chris Jones.
Development Objectives
In addition to above, the main objective of development of Terminator app was to provide an app that can arrange terminals in a grid-like structure. As a result the Terminator application’s supported features are tabs and drag and drop. Additionally, it also supports re-ordering of terminals. Moreover, Terminator supports numerous keyboard-shortcuts that makes it easy to work on. Therefore Terminator application can also save various configuration and profiles via its GUI preferences editor.
In addition to the above we can also extend the capability of Terminator Terminal by the use of numerous plugins.
Functions and Properties
Further, the development team of the terminator terminal are continuously working on the application. They are adding more and more new functions. Additionally, the development team is also working to make the application more versatile by extending its capabilities in other directions with simple and powerful features for system administrators as well as normal users.
In addition to above, the help pages and documentation for Terminator application’s main key bindings and useful configuration functions are part of the Terminator’s source package. Moreover, Help and Documentation of terminal is also available on its official website. The link to the official website is given at the bottom of the article.
In addition, we can view all the help and documentation of Terminator terminal by using the man command in the terminal itself.
$ man terminator$ man terminator configInstallation
Installation of Terminator terminal is simple and the install statements for Ubuntu and Debian Linux distros are given below.
For Ubuntu run the below given statements in the terminal window in the given order.
$ sudo add-apt-repository ppa:gnome-terminator$ sudo apt-get update$ sudo apt-get install terminatorFor Debian distributions we can find the latest version by just running the below given statement.
$ sudo apt install terminatorOfficial Website: Official Website of Terminator
