How to Install Apache2 on Debian 10

In this guide we will see how to install Apache2 Web Server on Debian 10 Buster. However, the Apache2 web server is one of the most popular web servers. Moreover, it has numerous robust features. Furthermore, these features include its ability to load various modules dynamically, Moreover, it also supports media element. In addition to above it has the capability to integrate with popular and widely used software.
| Link to the Official Website of Apache2 Web Server |
Additionally, here, in this article, we will learn how to install and configure Apache2 web server on our Debian 10 server.
Prerequisites for Installing Apache2 on Debian 10
- Firstly, we will need a machine with Debian 10 preinstalled on it. To install Debian 10 the link to the tutorial is given below:
How to Install Debian 10 Buster - Next, a stable and fast internet connection for downloading Apache2 and other necessary applications along with their dependencies.
Preparations for installation of Apache2 web server on Debian 10
However, for our tutorial on ‘How to Install Apache2 on Debian 10’ following prerequisites will be needed.
Create a non-root user with sudo privilege
Furthermore, to create non-root user run the following commands in the terminal window in the given order.
sudo adduser <username>sudo usermod -aG sudo <username>su - <username>Install and Configure UFW Firewall
Further, open terminal window in Debian 10 and run the following commands in given order to install and configure the firewall. Although, UFW firewall is pre-installed in Debian by default. But if UFW firewall is not pre-installed then run the following command in the terminal window.
sudo apt install ufwAdditionally, if you want to manage the firewall rules for IPV4 and IPV6 then open the following file in your favorite text editor. Further, ensure that the following content is there in the file. However, here we are using nano text editor.
sudo nano /etc/default/ufw| File content on /etc/default/ufw IPV6=yes |
sudo ufw enableInstallation of Apache2 Web server on Debian 10 Buster
As a matter of fact, the Apache2 Web Server is part of the default software repositories of Debian 10. Therefore, this enables us to install this web server by using the standard package management utilities of Debian 10 Buster. Further, first update the local package repositories by issuing the following command in the terminal windows in the given order.
sudo apt updateNext issue the command to install apache2 web server in the terminal windows.
sudo apt install apache2However, the above command will first confirm the installation option (Y/n). Then on the affirmative option will automatically install the Apache2 web server and all its dependencies.
Configuring the Firewall
Additionally, it is mandatory to alter the firewall settings so that apache web server is allowed to access the default web ports. However, if the UFW firewall is configured in such a manner that the outside port access is restricted for apache web server. Then the apache web servers register itself with UFW during the installation process. This enables some application profiles which may be used to enable or disable access to apache web server through the firewall. However, we can view the list of such applications by issuing the following command in the terminal window.
sudo ufw app listThe output we will get will be as shown below.
| Available applications: AIM ………………. WWW WWW Cache WWW Full WWW Secure ………………. |
As shown in the output list, the WWW profiles are apache profiles.
- The WWW profile opens port 80 for the web server that supports (normal, decrypted web traffic.
- The WWW Cache profile opens port 8080, this profile is used for caching and web proxies.
- WWW Full, this profile opens both port 80 that supports normal, decrypted web traffic and port 443 that supports TLS/SSL encrypted traffic.
- Apache Secure, this profile opens only port 443 that supports TLS/SSL encrypted traffic.
However, here we will only need to allow traffic on port 80, therefore issue the following command in the terminal window.
To allow traffic on port 80 through the firewall issue the following command:
sudo ufw allow httpTo allow traffic on port 443 through the firewall issue the following command:
sudo ufw allow httpsNow we can verify the change by issuing the following command.
$ sudo ufw statusThe output of the above command will be similar to the given below.
| Status: active To Action From — —— —- 80/tcp ALLOW Anywhere 443/tcp ALLOW Anywhere 80/tcp (v6) ALLOW Anywhere (v6) 443/tcp (v6) ALLOW Anywhere (v6) |
The above output indicates that the web server profile is now activated.
Testing of Apache2 Web Server
The installation process of apache2 web server starts the web server after the installation is complete. Therefore the web server will be running.
However, to check that the Apache web server service is running issue the following command in the terminal windows.
sudo systemctl status apache2The output will be similar to the shown below:
| sudo systemctl status apache2 apache2.service – The Apache HTTP Server |
The above output shows that the apache web server service is up and running successfully.
However, we can also check the status of the web server by typing the local IP in the browser. This will display the apache2 home page in the browser. However, if you do not know the local IP of your system. Then type the following command in the terminal windows.
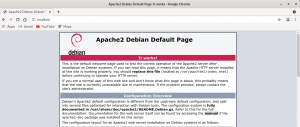
hostname –I [This will give the local IP of the system]Alternatively, typing http://localhost or http://127.0.0.1 in the address bar of the browser will lead to the default landing page of the apache web server. Moreover, the default landing page or home page of the apache2 web server is as follows.

Start, Stop, restart, Enable and disable Apache web service
However, to Start, Stop, restart, Enable and disable Apache web server issue the following command in the terminal window.
sudo systemctl start apache2sudo systemctl stop apache2sudo systemctl restart apache2sudo systemctl reload apache2sudo systemctl enable apache2sudo systemctl disable apache2Finally, we have successfully Installed Apache2 on Debian 10 Buster. Now we can start using our newly installed and configured Apache2 Web Server.


