How to Install LAMP on Ubuntu 20.04 with Screenshots

In this tutorial we will learn how to install LAMP on Ubuntu 20.04 with screenshots. Linux is an open source operating system whereas Apache, MySQL and PHP are also open source applications. However, the group of these applications is called LAMP stack. Moreover, LAMP stack is used to host dynamic websites on Linux Desktop / Server Systems. Here, in this guide we will learn how to install LAMP Stack on Ubuntu 20.04 server step by step.
What Is LAMP
As we know, LAMP is an abbreviation derived from the first alphabet of the following open source and free applications.
- L – Linux Operating System
- A – Apache Web Server
- M – MySQL Database Server
- P – PHP
The Prerequisites for installing Lamp Stack are:
- We will need a system with preinstalled Ubuntu 20.04 Server / Desktop Operating System
- Next, we will require a user account with root privileges for installation of related applications and their dependencies.
- We will also need a Stable and Fast internet connection for downloading and installing applications and their dependencies.
Start Ubuntu Server and Install Apache
Update Ubuntu 20.04
Furthermore, To Install LAMP Stack on Ubuntu, First boot your Ubuntu 20.04 server. Now, before start installing LAMP Stack we must update our operating system. For this, navigate to the Dash and select terminal windows, when the terminal window opens, issue the following commands in the given order to update our system.
sudo apt updatesudo apt upgrade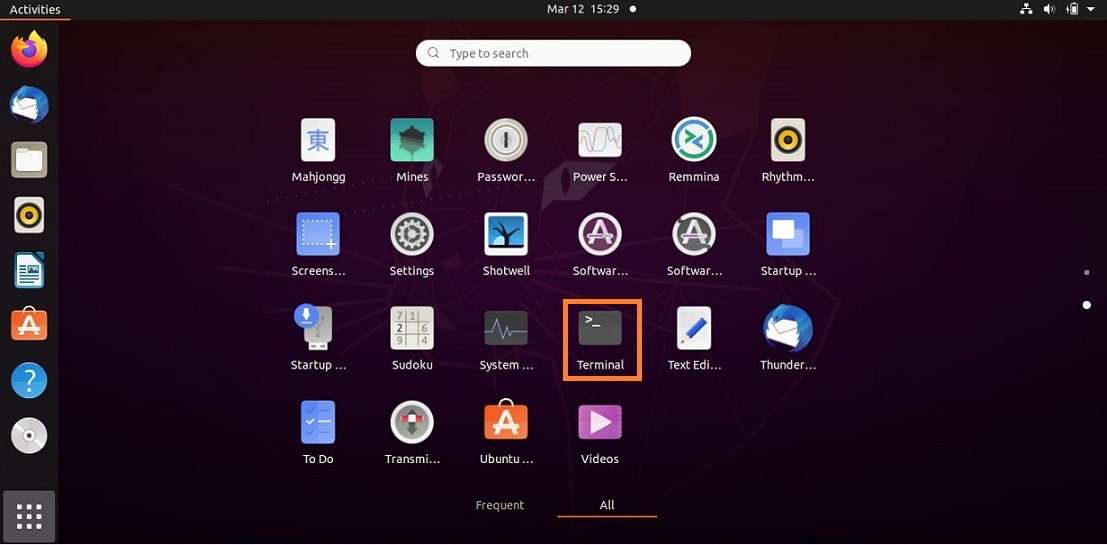
How to Install LAMP on Ubuntu 20.04 with Screenshots
Install Apache2 Web Server
Next, to install Aoache2 Web Server, open the terminal window and issue to following command.
sudo apt install apache2First, the apt command will then confirm for the installation of Apache Webserver on your system. At this, respond with Yes to continue the installation of Apache Web Server on your system.
Next, if you have UFW firewall installed on your system then you will be required to change the UFW firewall settings so as to allow the web traffic through the firewall. For this, you have to display the available UFW profiles. To get this list of profile, issue the following command in the terminal window.
sudo ufw app listThe output of the ufw app list command will be similar to the given below:

How to Install LAMP on Ubuntu 20.04 with Screenshots
To allow apache web server in ufw issue the following command in the terminal window.
ufw allow "Apache Full"To check the changes run the following command in the terminal window.
sudo ufw statusThe output of the command will be like this.

How to Install LAMP on Ubuntu 20.04 with Screenshots
Now the Apache web server is allowed through the UFW firewall.
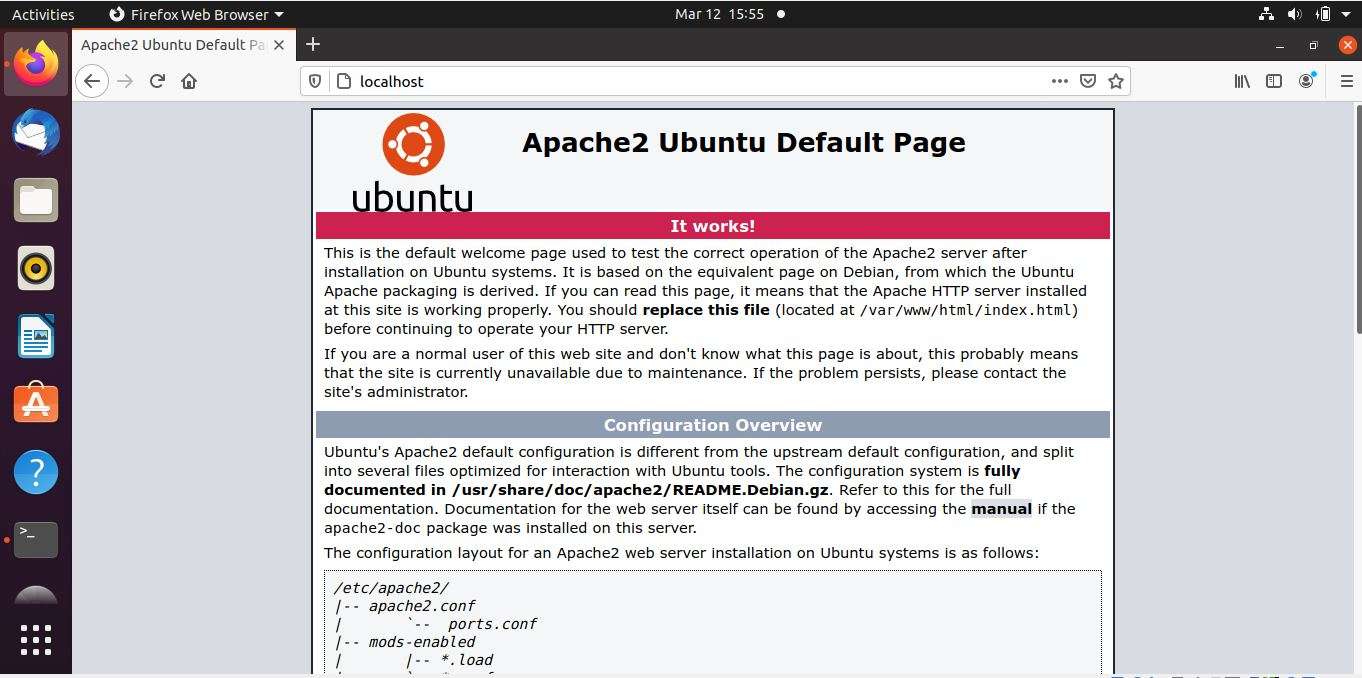
Now to finally check whether the Apache Webserver is correctly installed on your system open the web browser on your system. Type the following URL in the address bar of the browser.
http://(IP of your system) or http://localhostThe output should be like the below given figure.
How to Install LAMP on Ubuntu 20.04 with Screenshots
If the default Apache web page is opened like the above then the apache webserver is correctly installed on your system.
Installing MySQL on Your Ubuntu 20.04 System
Now Linux Operating System is already there and Apache Webserver is also installed and working correctly. Now we have to install the MySQL database server on the machine.
To install the MySQL Database Server run the following command in the terminal window with the root privileges.
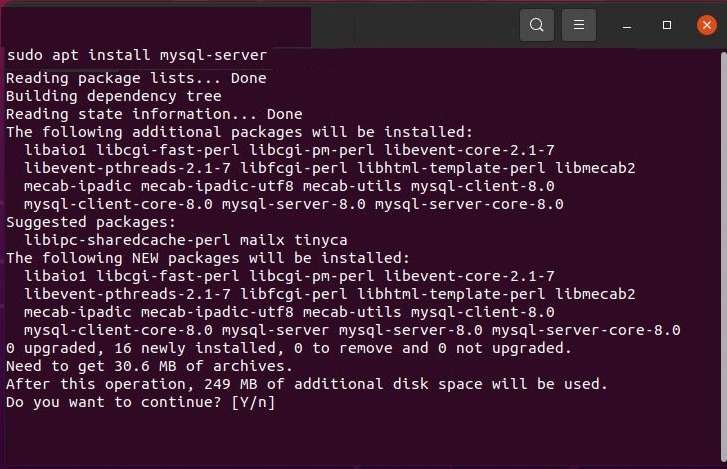
sudo apt install mysql-serverThe apt command will download and install the MySQL Server on your system. Before starting the installation of MySQL Server the apt command will show you the space to be used and will confirm for the installation. Type ‘Yes’ and press enter to continue with the installation.
 How to Install LAMP on Ubuntu 20.04 with Screenshots
MySQL Secure Installation
After finishing the installation execute the below given command in the terminal window.
sudo mysql_secure_installationThe above command improve the security of MySQL installation by:
- Setting password for root account of MySQL Database Server.
- Remove root accounts that are accessible from outside the local host.
- Delete the anonymous user accounts.
- Remove the test database
First it will prompt to configure the VALIDATE PASSWORD PLUGIN. Here you can set the database password strength as per your requirement. The values to select are 0, 1 and 2.
Then you have to create new password for the root user by typing and confirming the password.
Then installer will prompt you to remove the anonymous user from the MySQL Database. Remove the user by selecting yes.
Then installer will prompt you to disallow root login remotely. Disable the root login remotely by selecting yes. Then remove the test database and load privileges.
You can test MySQL Database Server by typing the following command in the command line.
sudo mysqlThe Output of the above command will be similar to the output shown in the image given below:

How to Install LAMP on Ubuntu 20.04 with Screenshots
You will be connected to the MySQL database as root user without entering the root password. This is because you are logged in the Linux System as root user with the sudo command. To exit from the root login type command quit.
Now you have MySQL database Server installed successfully on your server and secured it.
Installing PHP on Your Ubuntu 20.04 Server
Now you have to install PHP and its dependencies to complete the installation of the LAMP stack. To install PHP on your machine issue the command in the terminal windows as shown below.
sudo apt install php libapache2-mod-php php-mysqlThe above command will install the PHP programming language on your Ubuntu 20.04 Server. When the installation finishes, issue the following command to check the installation.
php -vThe output of the above command will be similar to the output as given below.

How to Install LAMP on Ubuntu 20.04 with Screenshots
Now to test your PHP installation navigate to the directory ‘/var/www/html’. Now, create a file named phpinfo.php using your favorite text editor. We are using nano text editor.
sudo nano /var/www/html/phpinfo.phpNow add the following lines in the phpinfo.php file and save and exit the text editor.
<?php
phpinfo();
?>
Now open your favorite browser and type http://localhost/phpinfo.php. The output in the browser will be similar to the output as shown below.
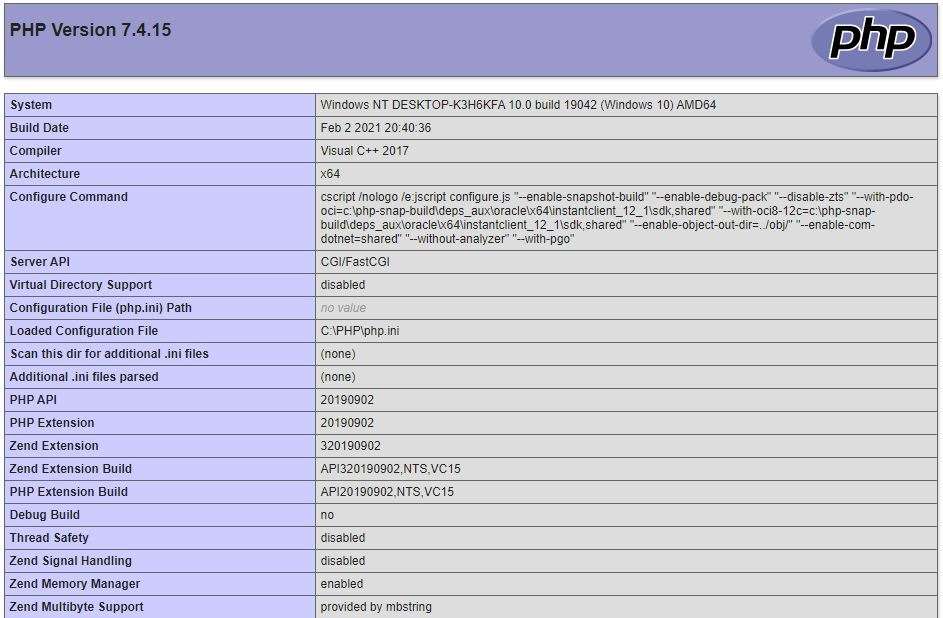
How to Install LAMP on Ubuntu 20.04 with Screenshots
Your LAMP Stack on Ubuntu is ready. Now you are ready to create and host dynamic websites on your Ubuntu 20.04 Linux Server.

