How to Install PhpMyAdmin on Ubuntu 20.04
5 min read
The phpMyAdmin was first released way back in 1998. Since then, it has become one of the most popular web frontend for MySQL Database Server. However, it is simple and easy to use web frontend for MySQL Database Server. As a matter of fact, it is complex to use MySQL Database through command line interface. Therefore, many MySQL database users prefer phpMyAdmin as their web frontend to work on MySQL databases. Here, in this tutorial we will learn, how to install phpMyAdmin on Ubuntu 20.04 LTS focal fossa.
Initially MySQL Database Server was an open source and free database server. Later on it was acquired by the Oracle Corporation. Currently Oracle Corporation maintains two editions of MySQL Database Server. The first one is the Enterprise Edition. This is a commercial edition and can be purchased from the Oracle Corporation. The second one is the community edition. This is free and open source addition. We will be using the community edition of MySQL Database Server to test and verify our phpMyAdmin installation.
The prerequisite for installing phpMyAdmin
- Firstly, we will require a machine with pre-installed Ubuntu 20.04 Desktop / Server operating system. To install and configure Ubuntu 20.04 LTS – Focal Fossa. You can follow our tutorial. The link to our tutorial is given below.
How to Install Ubuntu 20.04 LTS
- Also, we will need to install LAMP stack on our Ubuntu 20.04 System. So that, we can install and test phpMyAdmin on the System. To install LAMP Stack on Ubuntu 20.04 Desktop / Server System, you can follow our tutorial. The link is given below.
How to Install LAMP on Ubuntu 20.04 LTS
Update Ubuntu 20.04 Operating System
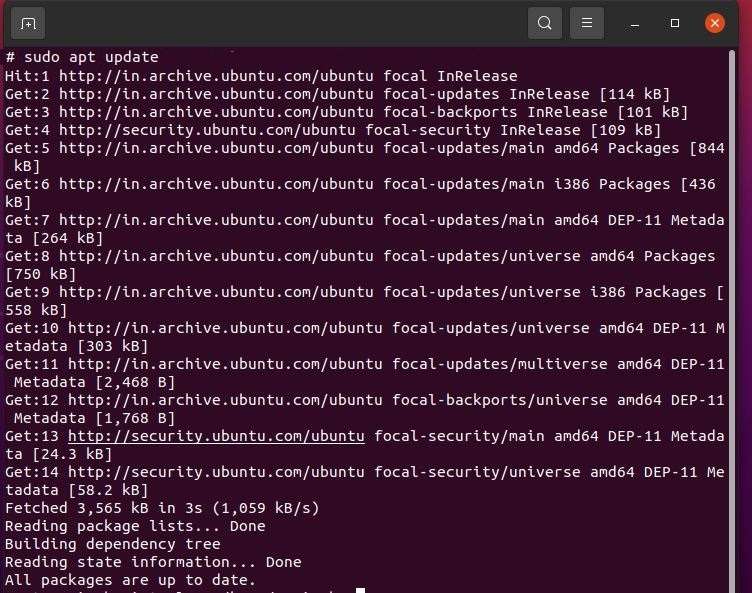
Next, go to the Dash and launch the terminal windows and update Ubuntu 20.04 LTS using the system update utility apt. The command to run in the terminal is.
sudo apt-get updateThis command will take some time to complete and is shown in the figure below:
How to Install PhpMyAdmin on Ubuntu 20.04
Install phpMyAdmin on Ubuntu 20.04 LTS Focal Fossa
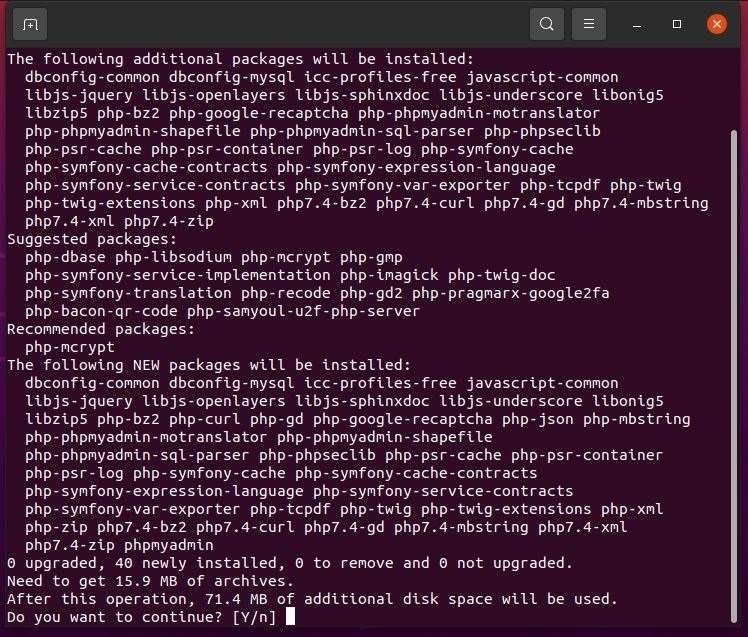
Now, we are ready to install phpMyAdmin on our system. We will issue the following command to install phpMyAdmin on our system. Here, we have to install some important extensions of phpMyAdmin along with the main installation. These most common PHP extensions are necessary to run phpMyAdmin. To start installation, we will issue the following command in the terminal window and press enter.
sudo apt-get install phpmyadmin php-mbstring php-zip php-gd php-json php-curlNext, the issued command will show the disk space to be used by the applications for this installation and seek confirmation of the user to proceed. Here, we will type Y to continue with the installation procedure.
How to Install PhpMyAdmin on Ubuntu 20.04
Basic Configuration Settings of phpMyAdmin
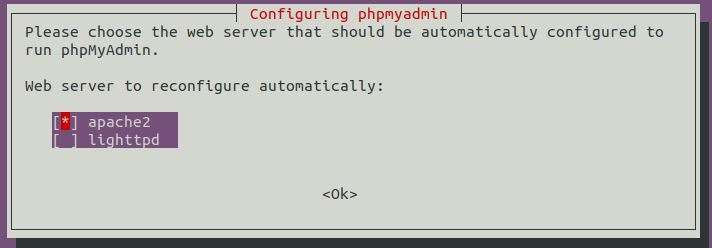
Now, as the installation will proceed. The installer will prompt to enter some required information for the setup of phpMyAdmin on our system. Then we have to select the webserver that we are using. Here we will select apache2 as our webserver as shown in the figure below.
How to Install PhpMyAdmin on Ubuntu 20.04
Configure phpMyAdmin Database (db-config-common)
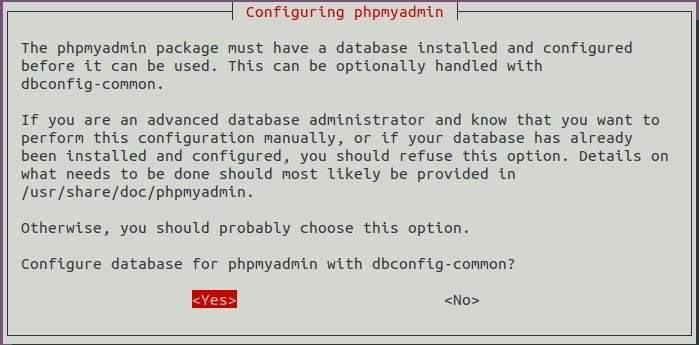
Then the phpMyAdmin installer will confirm whether you want to configure your database with dbconfig-common. Now, select Yes and press enter to continue as shown in the figure below.
How to Install PhpMyAdmin on Ubuntu 20.04
Confirm phpMyAdmin Password
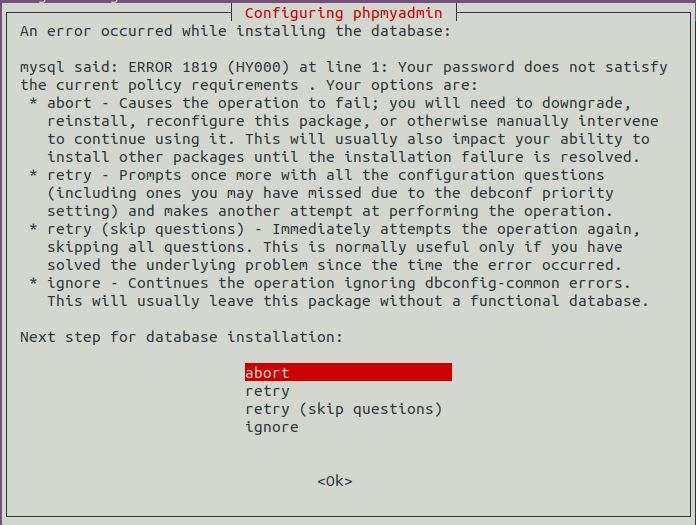
Now the installer will prompt us to enter and confirm the password for phpMyAdmin. Enter and confirm your chosen password and continue. If you have earlier setup the MySQL database password and installed the validate password component while installing the MySQL Database Server, then the above command will give error. Next, to set the things correct select the Abort option and stop the installation process for the time being.
How to Install PhpMyAdmin on Ubuntu 20.04
Uninstall Validate Password Plugin
Now Login to MySQL Database Server from the command line by issuing the following command in the terminal window.
sudo mysqlThis command will display the MySQL command line window on your terminal window. Now, enter the command given below to uninstall validate password plugin from MySQL Database Server.
mysql> UNINSTALL COMPONENT 'file://component_validate_password';This command will not uninstall the validate password plugin, it will only disable it. You can enable it later on. Now, exit from MySQL command line interface.
Restart phpMyAdmin Installation
Now to restart the phpMyAdmin installation on your Ubuntu 20.04 LTS system, run the following command in the terminal windows.
sudo apt-get install phpmyadminRe-Enable Validate Password Plugin
Now, the installation process will start again and will complete. When the installation process is completed. Again login to the MySQL Database Server by entering the below given command. Re-enable the validate password plugin.
sudo mysqlmysql> INSTALL COMPONENT 'file://component_validate_password';The above command will re-activate the password plugin. Type exit to logout from MySQL Database Server.
Enable PHP Extension mbstring
Now we have installed phpMyAdmin on our Ubuntu 20.04 LTS system, the only thing is remaining is to enable the mbstring extension of the PHP. For this issue the following command in the terminal window.
sudo phpenmod mbstringNow, restart the apache webserver by issuing the following command in the terminal window.
sudo systemctl restart apache2Change the Password Authentication Method in MySQL Database Server
When we install phpMyAdmin a database with the same name is created by the installer. This database performs some basic tasks of phpMyAdmin. It is recommended to access this database through the root user instead of Administrative User. To do this disable the authentication method in MySQL from auth_socket to caching_sha2_password method or mysql_native_password method.
To change the authentication method login to your MySQL Database Server as root and open the command line interface and issue the following commands.
For password authentication method – caching_sha2_password
mysql>ALTER USER 'root'@'localhost' IDENTIFIED WITH caching_sha2_password BY 'password';For password authentication method – mysql_native_password
mysql>ALTER USER 'root'@'localhost' IDENTIFIED WITH mysql_native_password BY 'password';Here in the above commands replace ‘password’ with your root password.
Some versions of PHP does not work reliably on caching_sha2_password method. If phpMyAdmin does not works with caching_sha2_password. If this is the case then switch to mysql_native_password method.
Now phpMyAdmin MySql Database Management Tool is installed on your Ubuntu 20.04 LTS system. Now open the web browser and type the following URL in the address bar of the web browser as shown below.
http://localhost/phpmyadminYou will get the PhpMyAdmin page as shown below.

How to Install PhpMyAdmin on Ubuntu 20.04
Now, Enter the User Name and Password to logon to MySQL Database Server from phpMyAdmin Graphical User Interface.
The installation and configuration of phpMyAdmin is complete now and we can start using it.

