How to Install Ubuntu 20.04 LTS Focal Fossa
In this tutorial we will learn how to install Ubuntu 20.04 LTS Focal Fossa desktop operating system on our system. The new Ubuntu 20.04 LTS operating system is codenamed Focal Fossa. Ubuntu 20.04 LTS Focal Fossa is a Long Term Support version of the operating system. Therefore it will get support and updates up to April 2025.
However, this Ubuntu 20.04 LTS installation guide is based on the installation documents released by Ubuntu 20.04 LTS and it will be helpful in the installation of Ubuntu 20.04 LTS on your Desktop or Laptop Computers.
Some of the Latest Features of Ubuntu 20.04 LTS Focal Fossa
- Not only a new Linux Kernel 5.4 is released in this latest version of Ubuntu 20.04 LTS, but also this new kernel has support for more new processors. Additionally, it has better power saving, better boot speed and also it has USB-C support and it comprises many new security updates.
- Updated Gnome desktop Environment Version 3.36 with better animations which is more polished and also has CPU usage.
- Additionally, it is important to note that the Ubuntu 20.04 LTS operating system supports the new and the latest ZFS 0.8.3 file system. This latest file system has much better performance and support for native encryption.
- Moreover, Ubuntu 20.04 LTS operating system also has a fresh new Dark theme.
- Additionally, a newly designed login screen is also introduced in the Ubuntu 20.04 LTS operating system.
- This new version of Ubuntu also has latest versions of the most popular programming languages viz; OpenJDK 11, PHP 7.4, Python 3.8, Ruby 2.7.0, GCC 9.3, Perl 5.30, Golang 1.13.
The recommended System requirements for Ubuntu 20.04 LTS.
- A computer or a Laptop having a 2.0 GHz dual-core processor or above.
- Additionally our Desktop or Laptop system should have at least 4GB memory or above for better performance.
- Moreover, the official installation manual suggests that at least 25GB available disk space is needed for storage. However, it may require less storage if the minimal version of Ubuntu 20.04 is installed.
- Our Desktop or Laptop system should have a DVD drive or a USB port – Can be installed from CD/DVD, USB, network install is also supported.
- Additionally, a 4GB or above USB drive will be needed for the creation of bootable media.
Next, for Selection and Downloading of Installation Media from Ubuntu Official Website. Open your favorite web browser and navigate to the official Ubuntu download page. Then select your version of Ubuntu that is appropriate for your Laptop or Desktop computer or Server machine. Following are the available versions of Ubuntu 20.04 LTS.
- Ubuntu-Desktop
- Ubuntu-Server
- Ubuntu-Derivatives
| Link to the Official Website of Ubuntu 20.04 LTS Focal Fossa for Downloading Installer ISO File |
Furthermore, after choosing your version of Ubuntu 20.04 LTS click on the Download button on the webpage. Next, this will take you to a thanks page on the website and the download of your chosen version of Ubuntu 20.04 LTS will start automatically. This will download an ISO installer file of the operating system on your computer.
Startup Disk Creators
Furthermore, for the Creation of the operating system installer USB DISK, we can use a startup disk creator application of Ubuntu operating system or UnetBootin for Linux, Windows or MacOS operating system .
Additionally, we can use Rufus startup disk creator for the creation of the installer USB DISK on the windows operating system. Rufus is twice as fast as UNetbootin Disk Creator Utility or Universal USB installer or Windows Disk Creation Utility, as claimed on the official website of Rufus.
| Link to the Official Website of UNetbootin Startup Disk Creator Tool for Download |
However, all the above startup disk creation applications are easy to install and use.
| Link to the Official Website of Rufus Startup Disk Creation Tool for Download |
Next, configure the first boot device as USB DISK in the BIOS menu of your Desktop or laptop computer to boot from the installer media. Now insert the Ubuntu 20.04 LTS startup USB DISK into the system and turn on the machine. Your machine will start loading and you will be presented with Ubuntu live disc menu with the Options ‘Try Ubuntu’ and ‘Install Ubuntu’.
However, we can have a look at Ubuntu 20.04 by clicking the Try Ubuntu icon. This will run Ubuntu from the USB DISK Drive.
Installation of Ubuntu 20.04 LTS
To install Ubuntu 20.04 LTS click the ‘Install Ubuntu’ icon and the installation will start automatically.
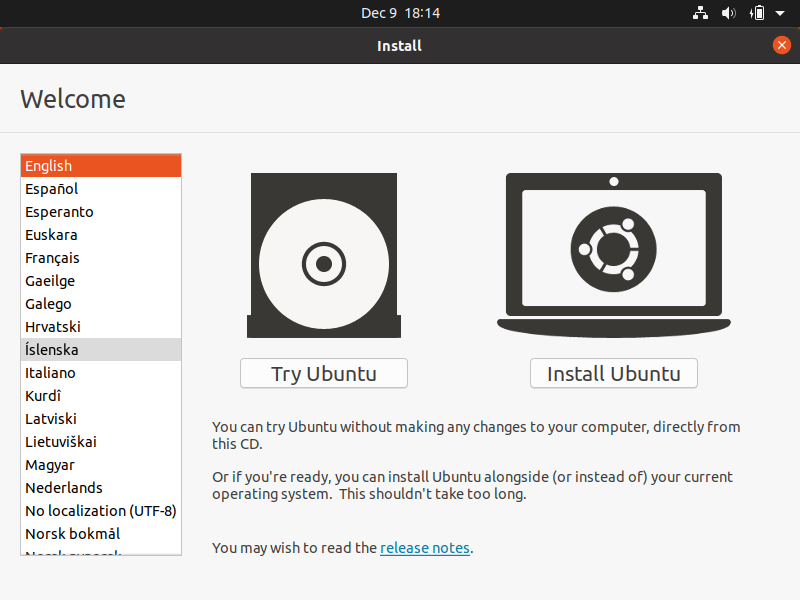
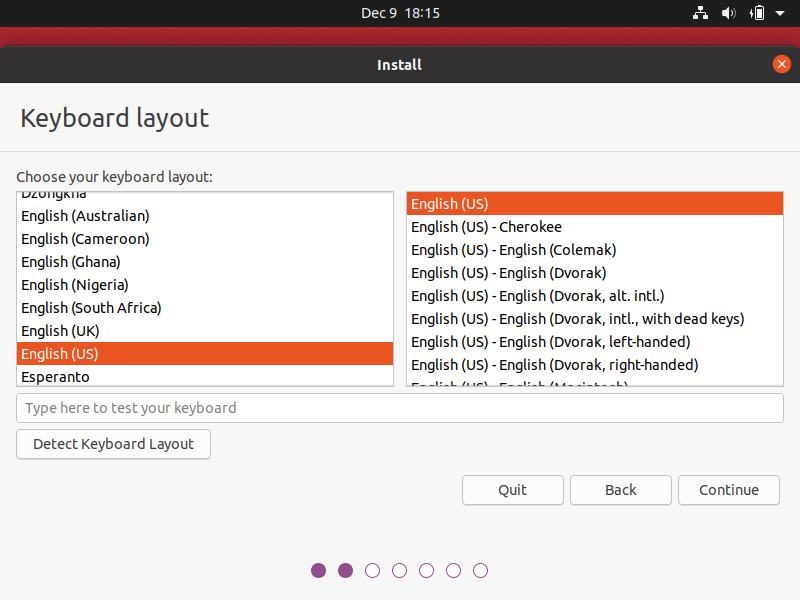
The default selected keyboard layout is English – English. Select the keyboard layout that is appropriate for you and click continue.
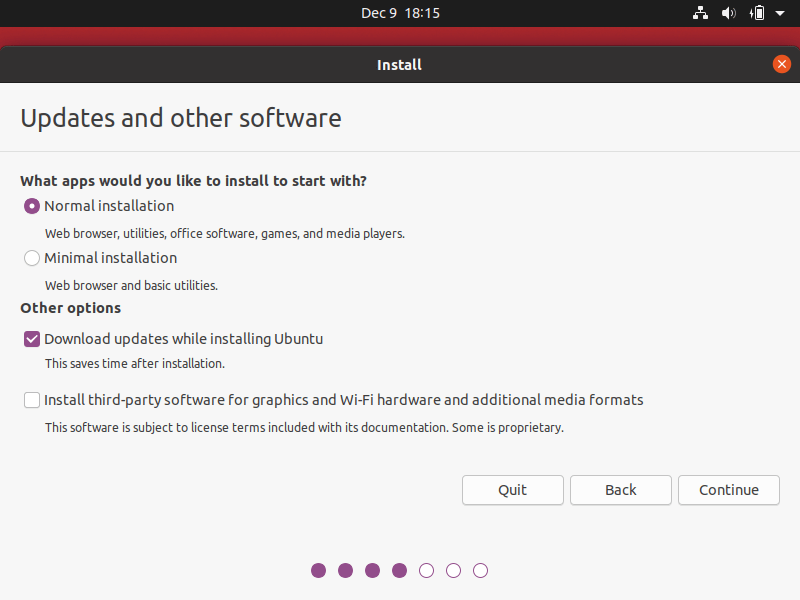
Normal Installation is the complete Ubuntu Desktop experience, with all the included software applications like LibreOffice software, Browsers, Media Players, and games.
Minimal Installation is as the name suggests is the disk space-saving option and is without the additionally included software.
Download updates while installing Ubuntu will download and install the latest updates while installing Ubuntu. Select appropriate options and continue.
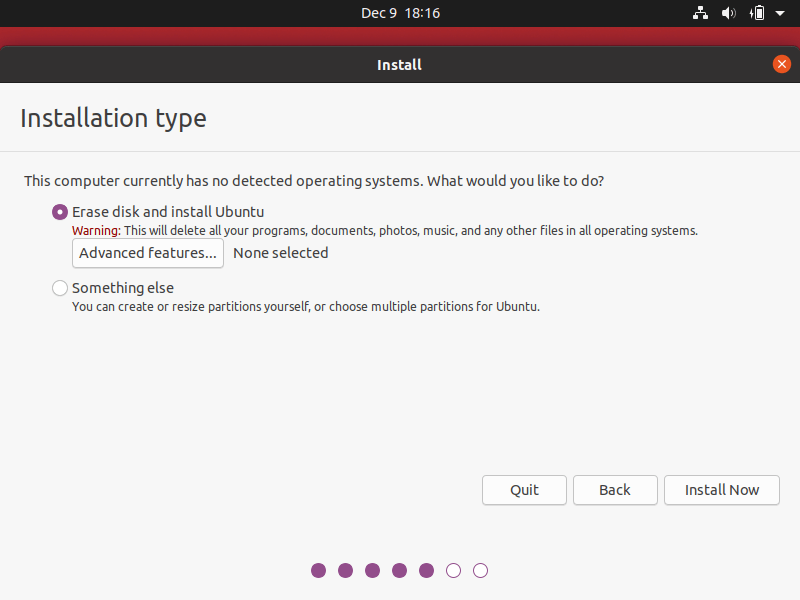
After this installation type windows will appear. Further, selecting Erase disk and install Ubuntu our disk will be erased and new automated installation will begin.
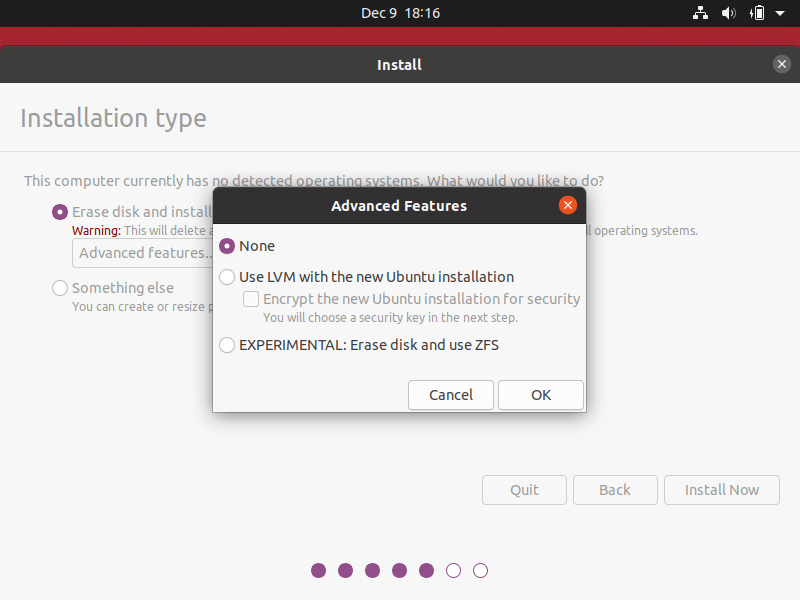
There is an Advanced Features option for advanced users. The advice options are:
- Use LVM with the new Ubuntu installation. Here LVM means Logical Volume Management. The work of the LVM is to dynamically manage different virtual drives of the system.
- Use Encrypt the new Ubuntu installation for security to encrypt the hard disk contents. The security key will be used to decrypt the disk drive .
- Use Erase disk and use ZFS to Zettabyte File System. Because it is in the testing phase do not use this for production environments.
- To create our own hard disk partitions select the Something Else option.
The next window will confirm to create our partition table and selecting ‘Yes’ will create the partitions as selected by us.
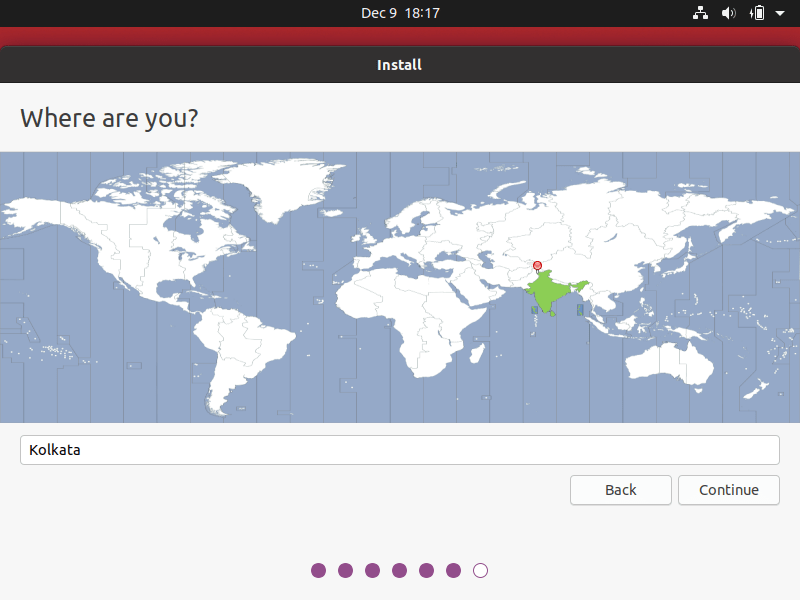
Next select the Select Time Zone, the nearest district, the system will set the time of your machine accordingly. You can change this Time zone after completing the installation of Ubuntu. Then click Continue.
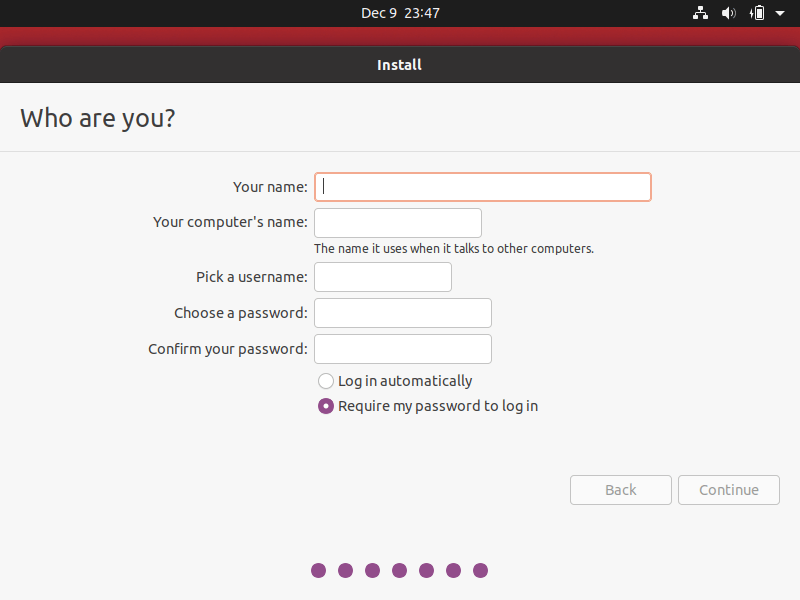
Fill in the details of the New User Account and click Continue to start the installation of Ubuntu.
Finishing the Installation
Remove the installation media and restart the system.
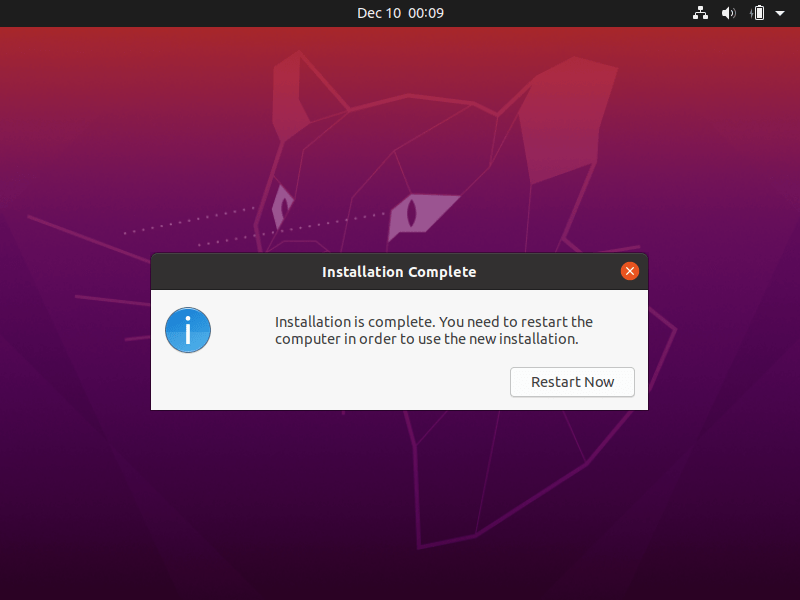
The system will boot into the new install of Ubuntu 20.04 LTS.


