How to Install Xrdp Remote Desktop on Debian 10
In this tutorial we will learn how to install and configure xrdp Remote Desktop Server application on Debian 10 Buster operating system. However, xrdp Remote Desktop Server is an open source and freely available remote desktop application. Moreover, it uses Microsoft Remote Desktop Protocol that connects to the remote computer. Additionally, xrdp Server initiates a new session to logon to the remote computer. When the user is connected to the remote computer he feels like he is working on a local system.
In addition to above according to the official website of xrdp, it accepts graphical connections from many different RDP clients. Some of the examples of these RDP Clients are FreeRDP, rdesktop, NeutrinoRDP and Microsoft Remote Desktop Client (for Windows, macOS, iOS and Android).
Install Xfce Desktop Environment on Debian 10 Buster
If you are trying to install xrdp Remote Desktop Server on Debian 10 Buster Server system. Then first you have to install a Desktop Environment on your Debian 10 Server. Xfce Desktop Environment is the most suitable desktop environment for this as it is lightweight and fast. Also you can install any other desktop environment to your liking. Because Xrdp Server connects to graphical interface only and Debian 10 Server does not have the graphical interface. To install the Desktop Environment on Debian 10 Server open the terminal window and issue the following command.
sudo apt update && sudo apt upgradeAfter the system is updated install the tasksel utility on Debian 10 Buster by issuing the following command in the terminal window. The tasksel utility is used to install Desktop Environment in Debian 10 Buster.
sudo apt install tasksel -yNow run the tasksel utility by issuing the following command in the terminal window.
taskselThe output of the above command will be similar to the given below image.
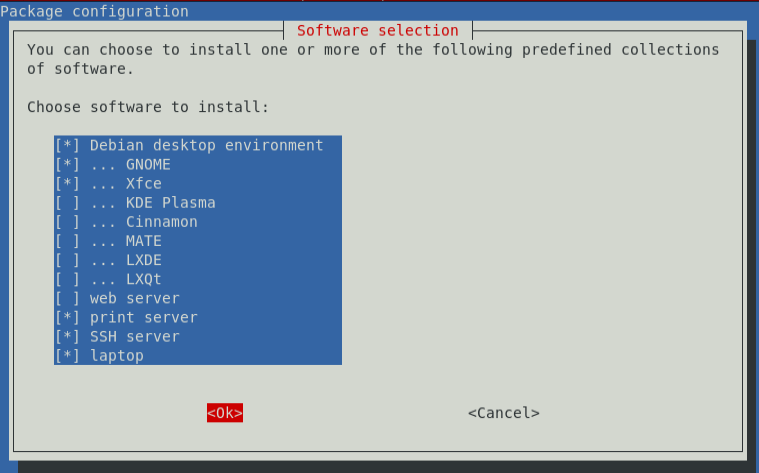
Now scroll down the list and select the xfce desktop from the list by pressing spacebar on the keyboard as shown in the figure and press tab key to move to the ok button and press enter button to start the installation of the xfce desktop environment. Now the Desktop Environment will take some time to install depending on the configuration of your system.
After the installation of xfce Desktop Environment is finished. Then restart the Debian 10 System to apply the changes. After the restart of the system select xfce desktop and login. As shown in the figure below.
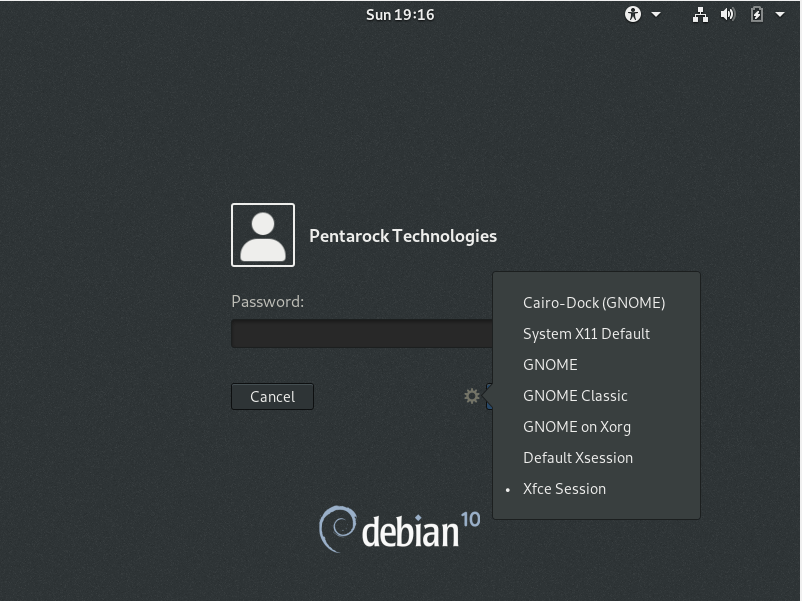
Installing Xrdp Remote desktop Server on Debian 10 Buster
The Xrdp Remote Desktop Package is a part of standard repository of Debian 10 Buster operating system. Therefore this can be installed with the apt command of Debian 10 Buster operating system. Now to install Xrdp Remote Desktop Server, open the terminal window and issue the following command as shown below.
sudo apt install xrdpWhen you will run the above command the system will prompt you for installation of the application and on the affirmative response the installation will begin.
After the completion of the installation of Xrdp remote Desktop Server, the Xrdp service will automatically start running. To verify whether the Xrdp service is running or not, issue the following command in the terminal window as shown below.
sudo systemctl status xrdpThe output of the above install xrdp command will be similar to the figure as shown below.
| sudo apt install xrdp Reading package lists… Done Building dependency tree Reading state information… Done The following additional packages will be installed: xorgxrdp Suggested packages: guacamole xrdp-pulseaudio-installer The following NEW packages will be installed: xorgxrdp xrdp 0 upgraded, 2 newly installed, 0 to remove and 0 not upgraded. Need to get 607 kB of archives. After this operation, 3,941 kB of additional disk space will be used. Do you want to continue? [Y/n] Y Get:1 http://deb.debian.org/debian buster/main amd64 xorgxrdp amd64 1:0.2.9-1 [172 kB] Get:2 http://deb.debian.org/debian buster/main amd64 xrdp amd64 0.9.9-1+deb10u1 [435 kB] Fetched 607 kB in 1s (798 kB/s) Selecting previously unselected package xorgxrdp. (Reading database … 194299 files and directories currently installed.) Preparing to unpack …/xorgxrdp_1%3a0.2.9-1_amd64.deb … Unpacking xorgxrdp (1:0.2.9-1) … Selecting previously unselected package xrdp. Preparing to unpack …/xrdp_0.9.9-1+deb10u1_amd64.deb … Unpacking xrdp (0.9.9-1+deb10u1) … Setting up xrdp (0.9.9-1+deb10u1) … Generating 2048 bit rsa key… ssl_gen_key_xrdp1 ok saving to /etc/xrdp/rsakeys.ini Created symlink /etc/systemd/system/multi-user.target.wants/xrdp-sesman.service → /lib/systemd/system/xrdp-sesman.service. Created symlink /etc/systemd/system/multi-user.target.wants/xrdp.service → /lib/systemd/system/xrdp.service. Setting up xorgxrdp (1:0.2.9-1) … Processing triggers for systemd (241-7~deb10u8) … Processing triggers for man-db (2.8.5-2) … Processing triggers for libc-bin (2.28-10) … |
The Xrdp Remote Desktop Server uses the /etc/ssl/private/ssl-cert-snakeoil.key file. This file can only be accessed by the users who are members of the “ssl-cert” group. Now we have to add Xrdp to “ssl-sert” group. To do this open the terminal window and issue the following command to add the xrdp user to this group.
sudo adduser xrdp ssl-certThe output of the above command will be similar to given below figure.
| sudo adduser xrdp ssl-cert Adding user `xrdp’ to group `ssl-cert’ … Adding user xrdp to group ssl-cert Done. |
Configuring the Firewall in Debian 10 Buster
Now verify the status of the ufw firewall on your system. To verify the status issue the following command in the terminal window.
sudo ufw statusOn my system fresh Debian 10 operating system is installed. Therefore the ufw status shows that ufw is not installed on my system. The output of the above command is.
| sudo ufw status sudo: ufw: command not found |
In this case you have to install ufw firewall on your system. To install ufw firewall on Debian 10 issue the following command in the terminal window.
sudo apt install ufwIt will not take much time to install. Now we will enable the firewall and restart the service. To do this issue the following command in the terminal window.
sudo ufw enableThe output of the above command will be similar to.
sudo ufw enableFirewall is active and enabled on system startup
Now we will restart the ufw firewall services on our system. To restart the ufw service on the system issue the following command in the terminal window.
sudo service ufw restartThe Microsoft RDP port 3389 is the default port of the Xrdp Server. Therefore we have to open this port in the firewall so that connection can be made through this port. Additionally we have the option to open this 3389 port for some specific IP addresses or we can open this port for all IP addresses. It is recommended that you open this port for specific IP Addresses only for security reasons. I assume that you have UFW firewall installed on your Debian 10 Buster system. To open a specific IP address for this port issue the following command in the terminal window.
sudo ufw allow from 192.168.1.25/24 to any port 3389The above command will allow the IP Address 192.168.1.25 through 3389 port.
To allow all the IP Addresses issue the following command in the terminal window.
sudo ufw allow 3389Allowing all IP addresses id not recommended.
Connecting to Xrdp Server
Now we have installed and configured the Xrdp Server and ready to connect from Windows. Now move to any Windows machine and run the remote desktop command. Below given is the screenshot of the same.
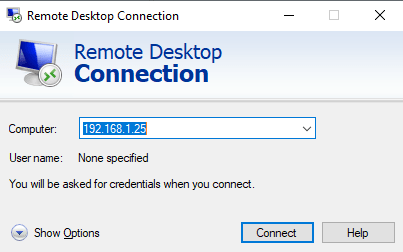
Now enter the IP Address of the Debian 10 Buster System to connect with Microsoft Remote Desktop Application. Then Click connect button to initiate the connection. Below given is the screenshot of the same.
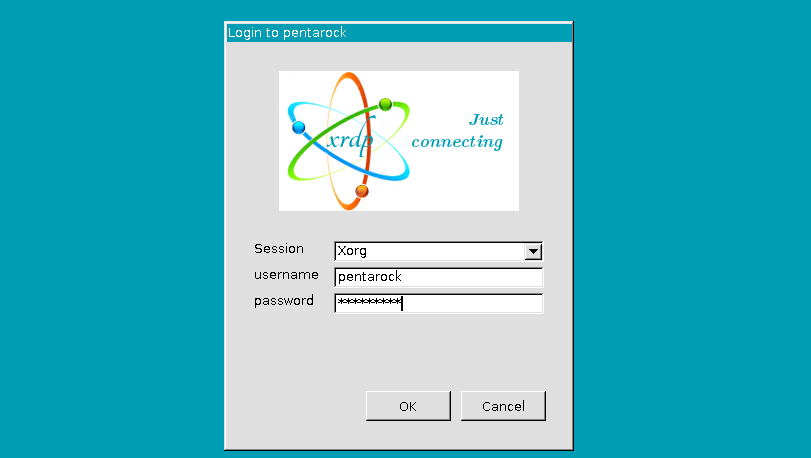
Now enter the user name and password of the remote Debian 10 Buster system to log on to the remote system. Click on the OK button to log on to the remote computer. After the system is connected then it will look like the image given below.
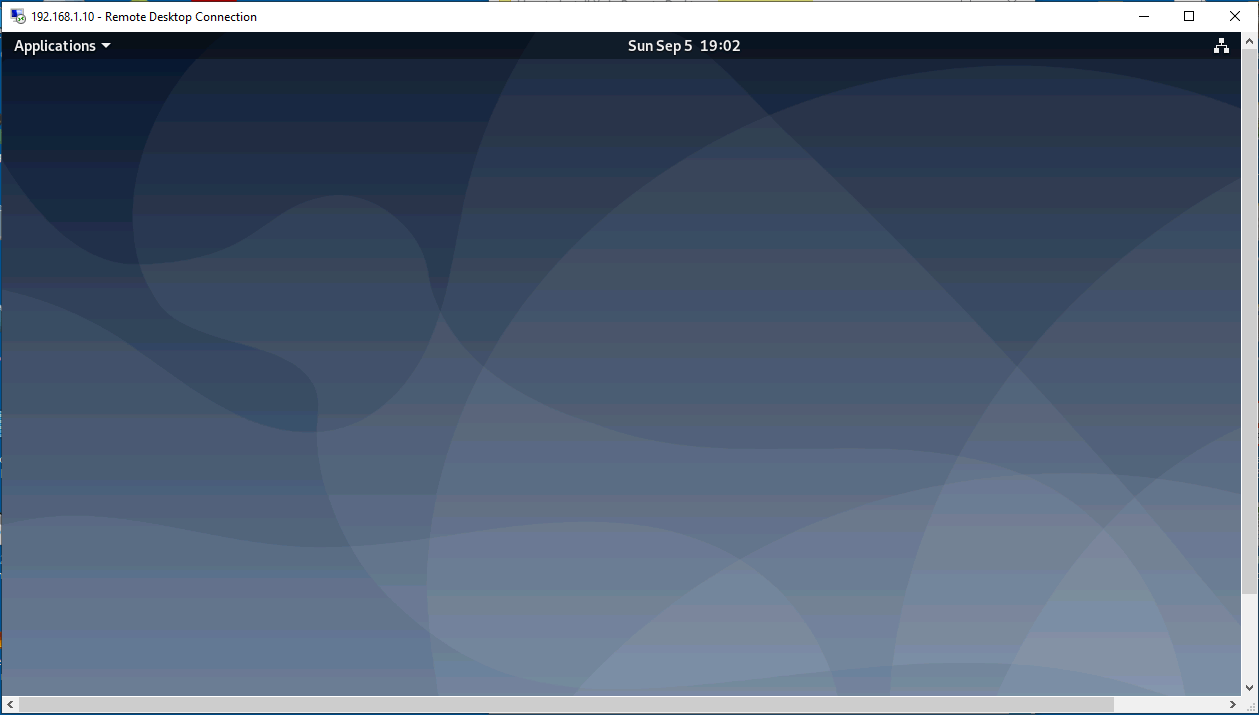
Now we have successfully installed and configured the Xrdp Server on Debian 10 Buster. Enjoy!

